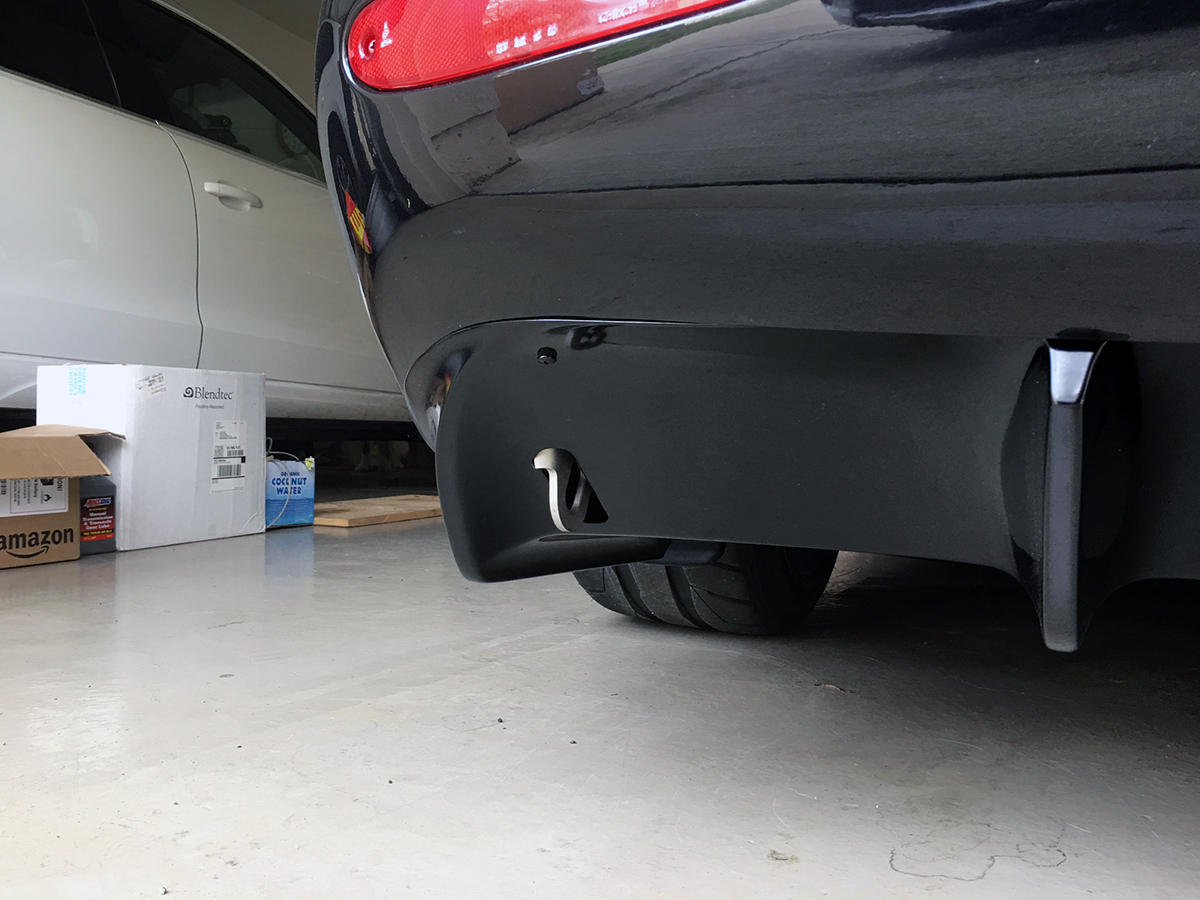
With great stubbornness, I held off on installing a diffuser for these past 4 and a half years. I had a carbon fiber replica diffuser from Shine Auto at the very beginning, but removed it immediately in favor of the simpler look of the factory valence. Since my direction was to achieve a clean, understated look with the exterior aesthetics, I think it was the flashiness of the giant piece of carbon fiber glitzing the underside of the rear end that caused a clash. Once I removed it, I never looked back… until now.
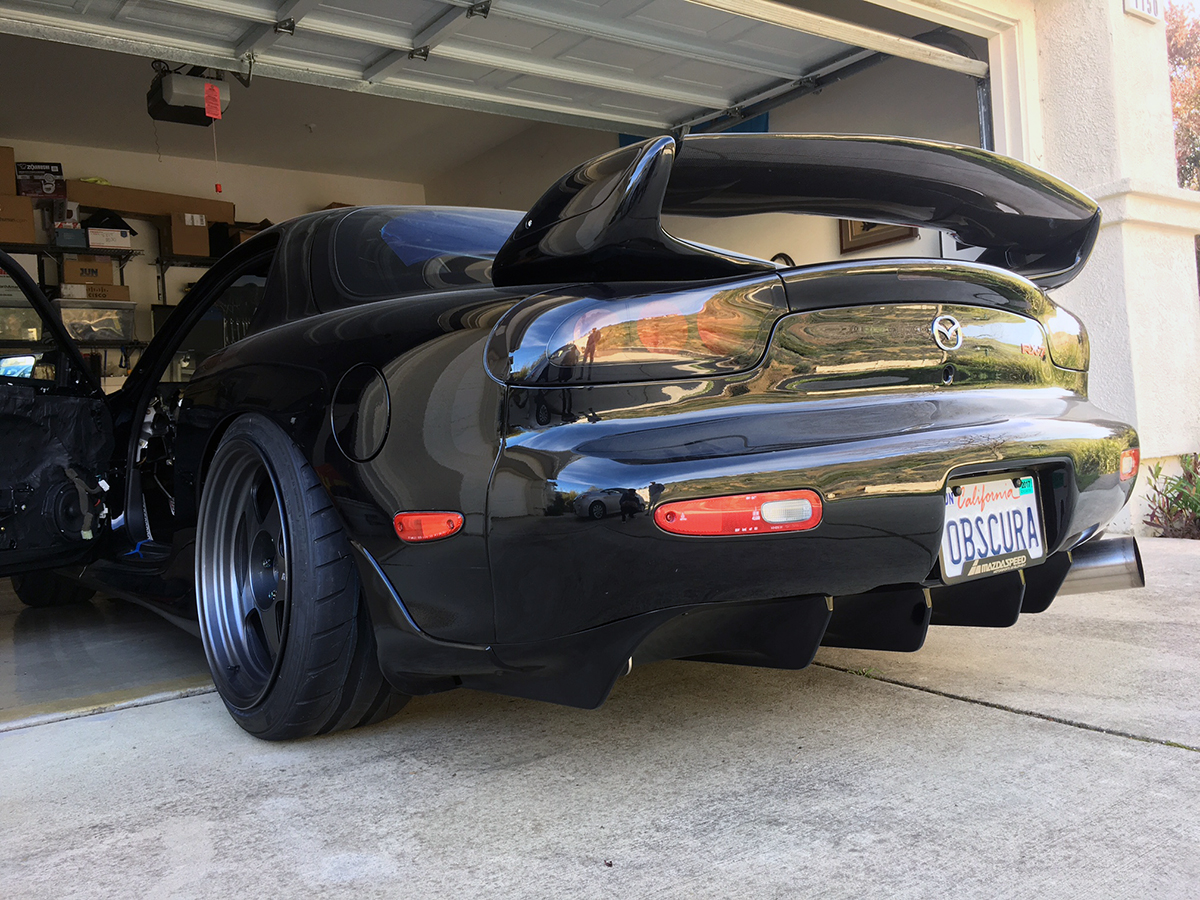
As progression was made and the car grew increasingly modified, it naturally followed a more aggressive look and has now reached a point where the explicitly preserved rear end is suffering from being too underwhelming by comparison. With all of the exterior modifications around the rest of the car, it was time to enter back into the fold and consider a diffuser to keep in flow. Over the years, I casually surveyed all of the available diffuser options and found a few interesting choices, especially the one from DAMD in Japan. In the end I could not deem an alternative to be more preferable and I still sided with the tried and true RE-Amemiya Street diffuser. I believe it stands as the quintessential choice for a stock body RX-7.
In order to not repeat history, although now under a slightly different context, I decided to go with the plainer FRP version this time. There was a reason why my first go around with the diffuser created discomfort and lead me to removing it so hastily. As aforementioned, having a prominent blanket of carbon fiber hanging from the rear was too ostentatious for my liking. And since I settled on FRP over carbon fiber, I placed an order for the diffuser directly with RE-Amemiya in Japan, who only makes it in the former type of material. The Shine Auto replica or counterpart is prolific, especially in the United States, so it was hard to find an application of an actual RE-Amemiya diffuser installed – except to go for it myself.
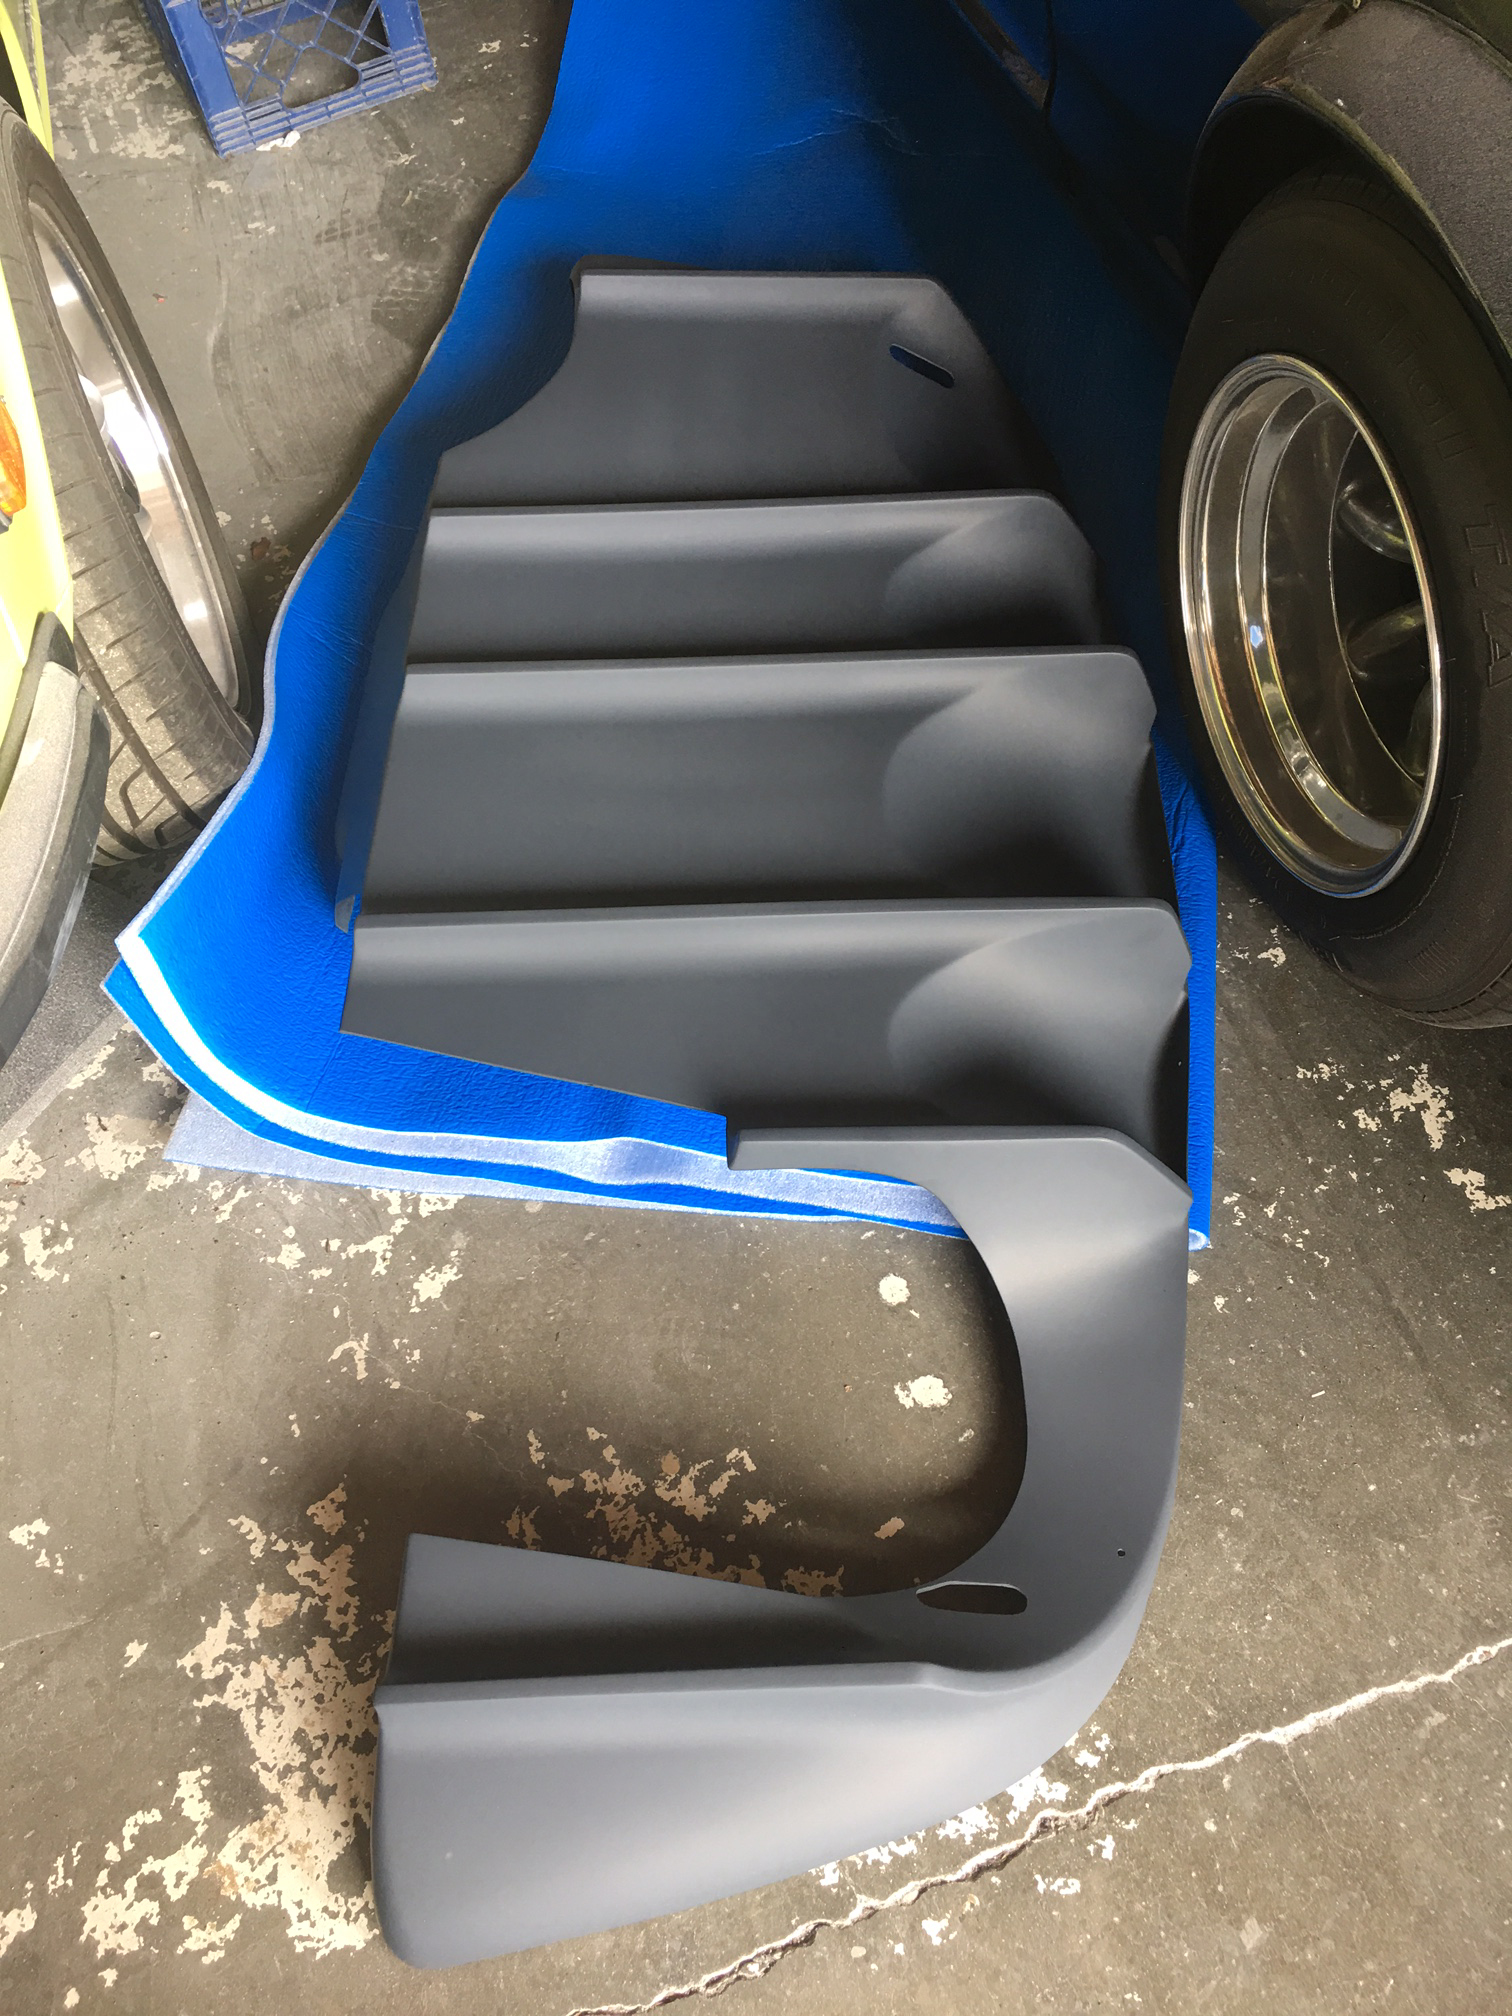
Within about a month, a freshly molded diffuser arrived at my painter’s doorstep and was ready for prep work. They come with a black gel coat which many people install straight away, but I wanted to make sure all minor imperfections were fixed and smoothed out.
Here it is after primer and sealer.
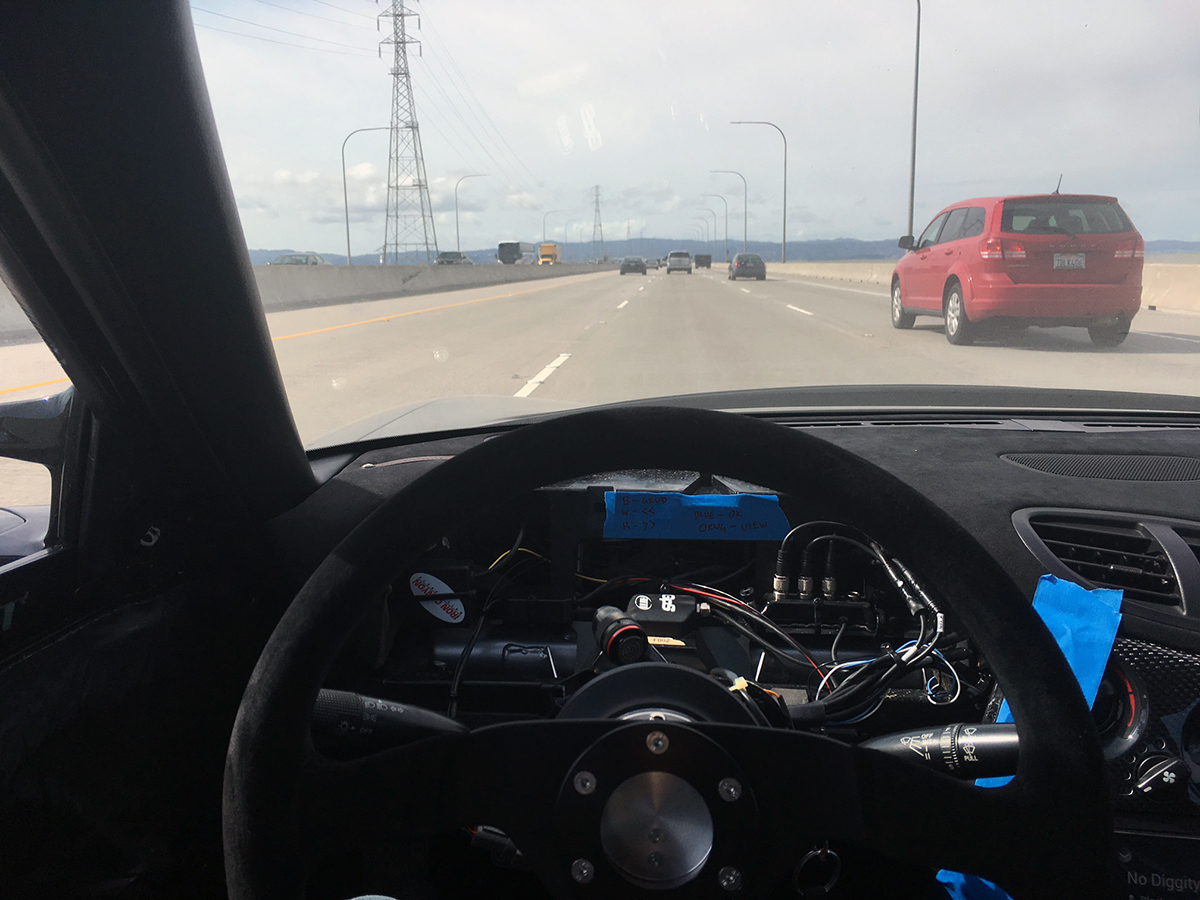
Once the initial prep work was ready, the diffuser was ready for fitting before the final spray. I drove my car over to the shop, sans gauge cluster and all.
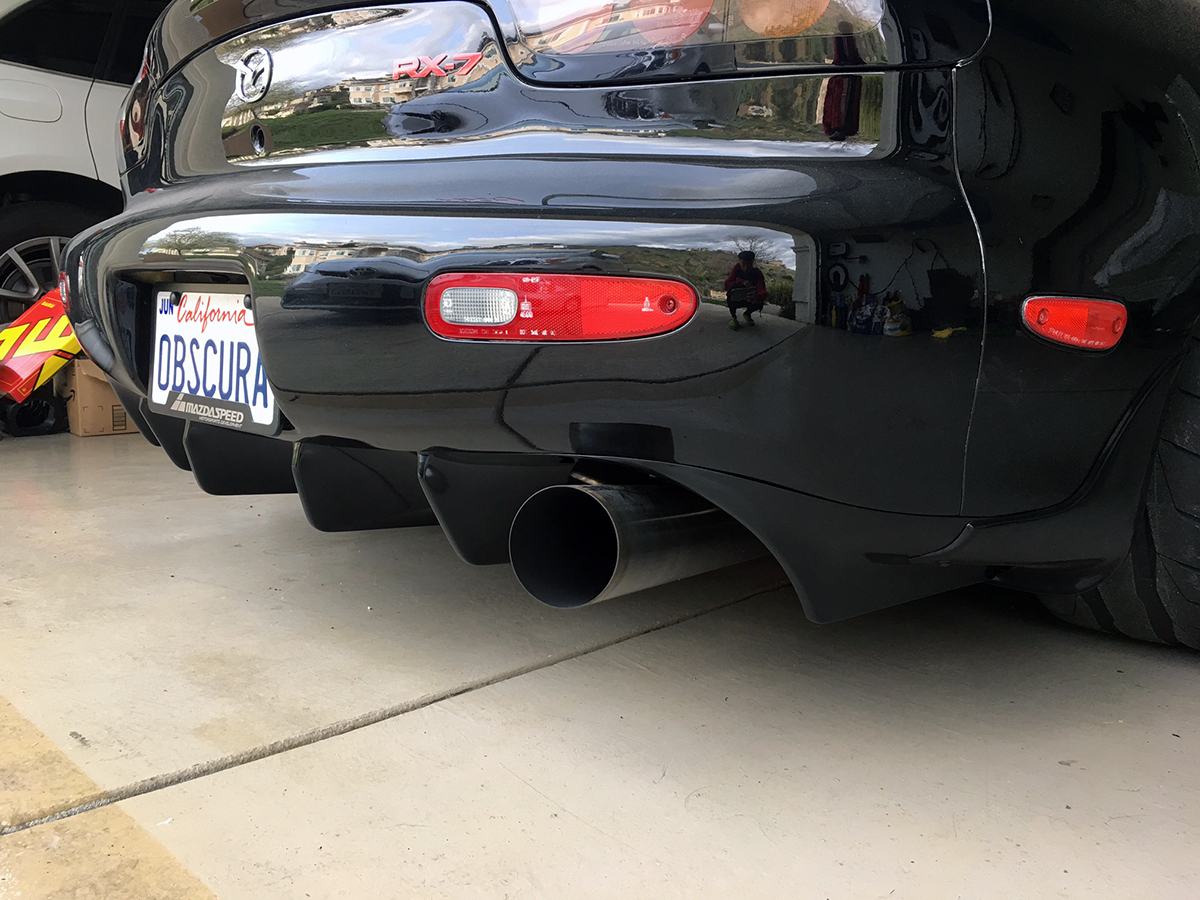
I asked to have it sprayed in a satin black, but the color ended up coming out closer to a semi-gloss black. So after all that work, the finish of the diffuser circled back to being like the original gel coat – until you’re about 5 feet away, of course. Either way, the tone of the black is dark and the diffuser fit up well, a quality that I was especially keen on finding out.
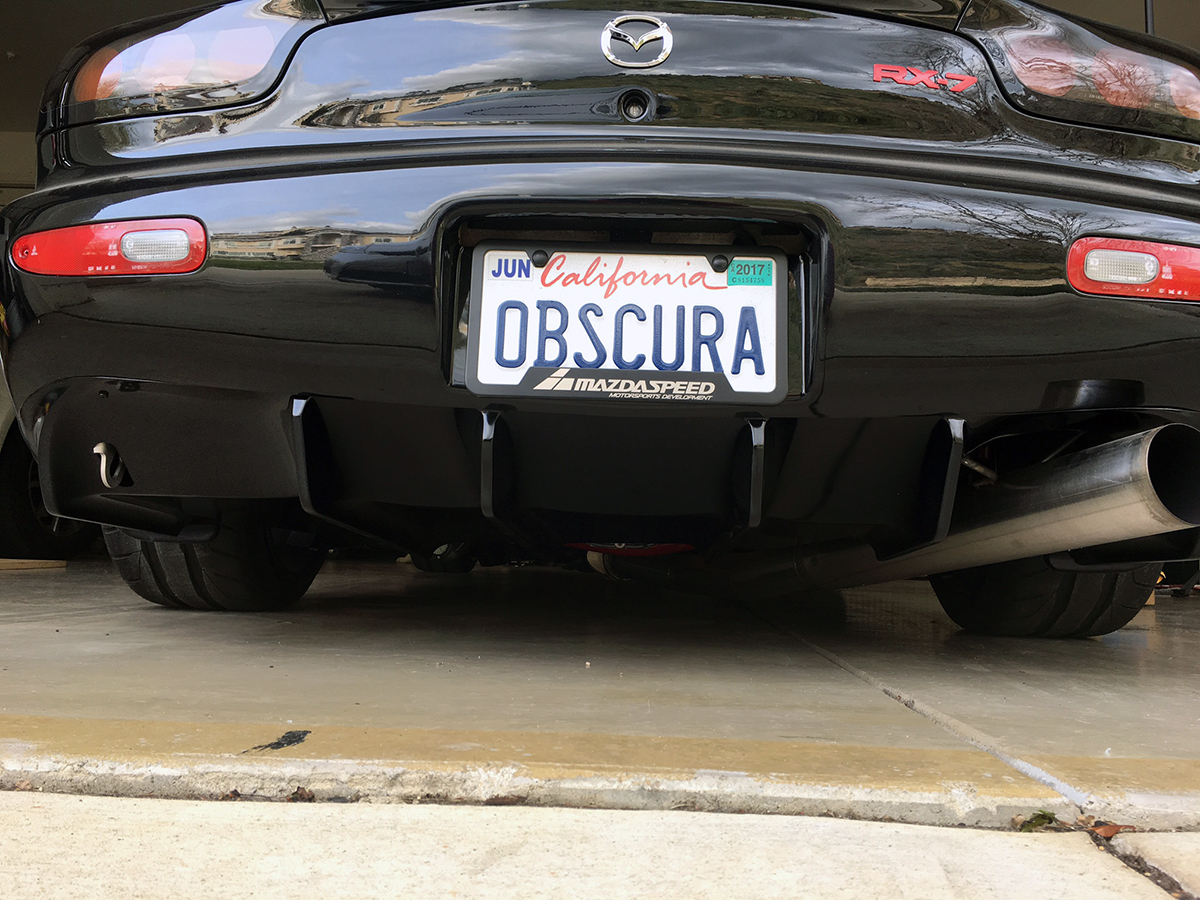
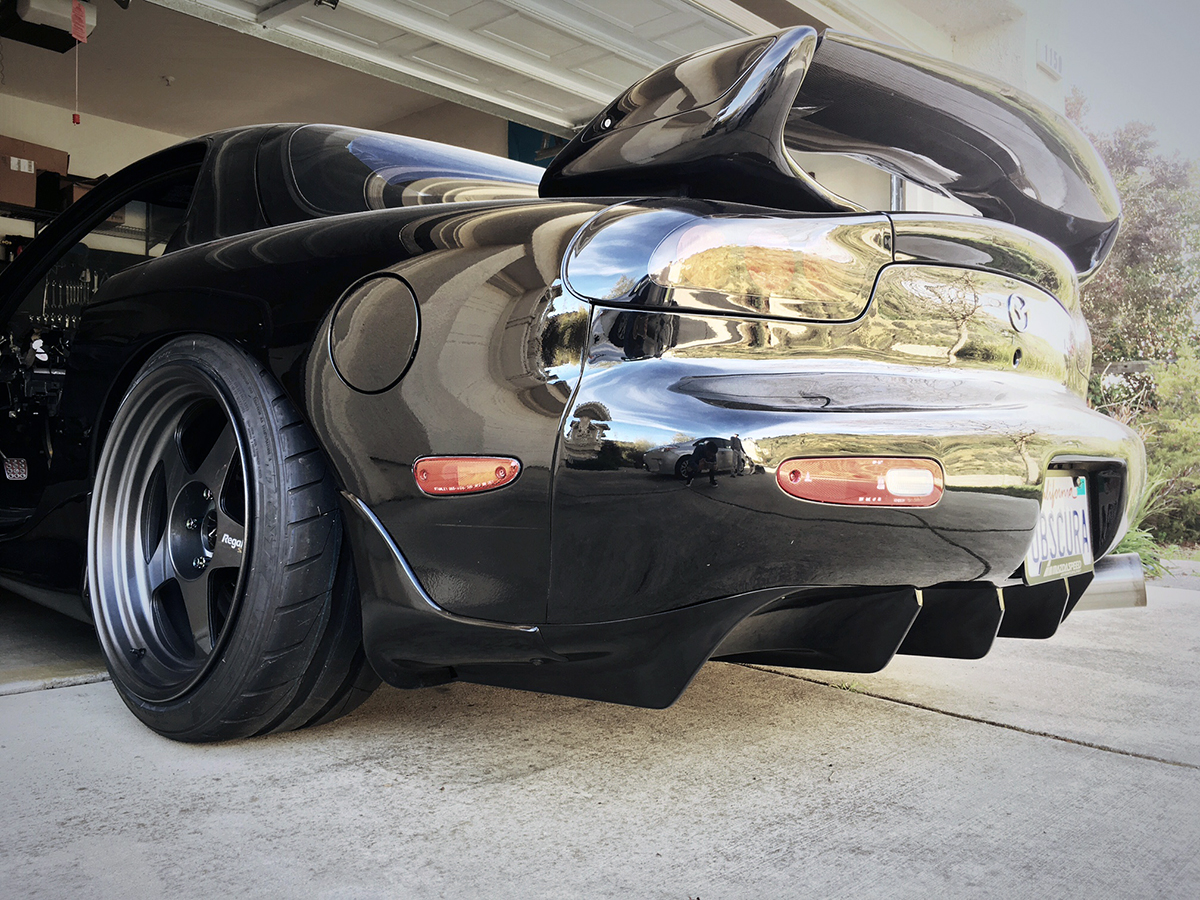
I had the rear mudflaps removed and then reinstalled over the diffuser, following its line as closely as possible to flow together.
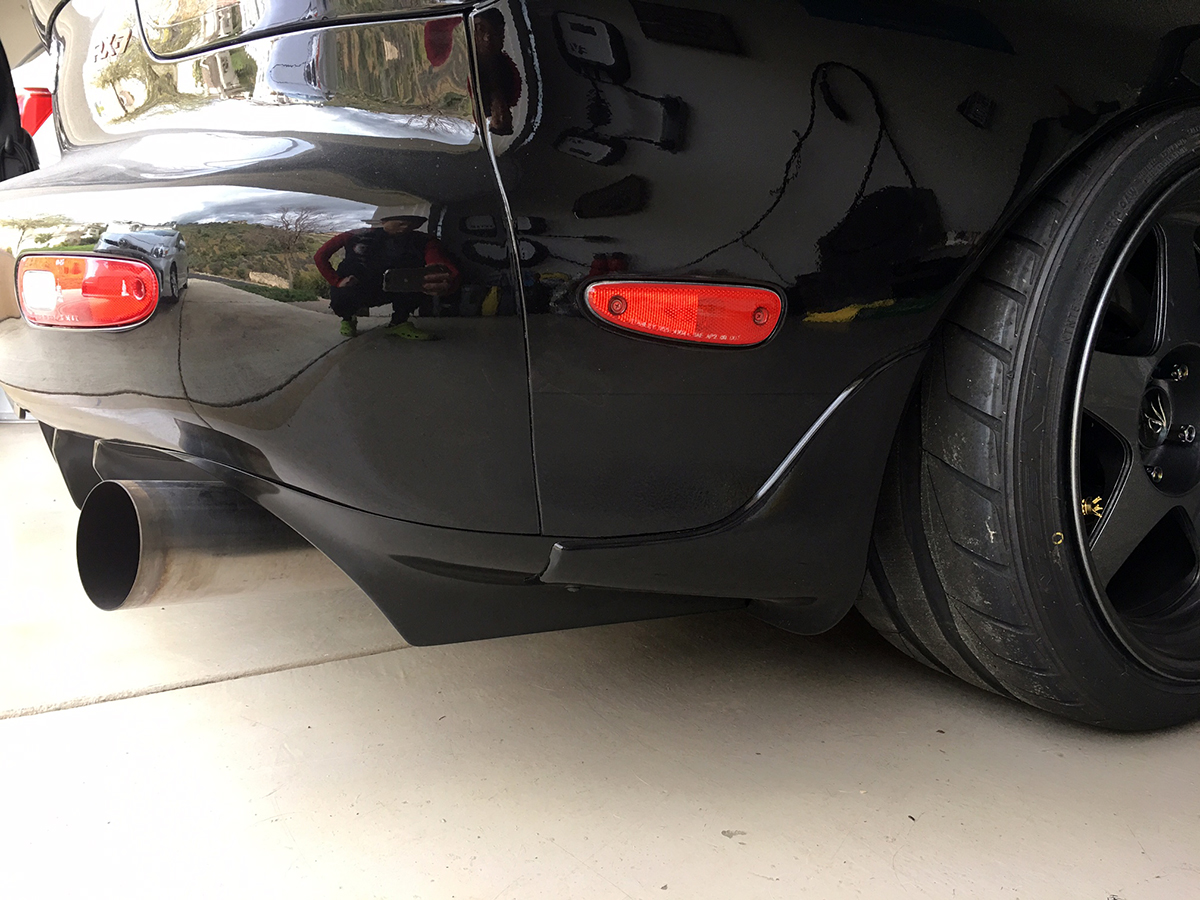
Another cool feature of the RE-Amemiya version is the addition of tow hook cutouts. I was able to retain my driver side rear tow hook.
Overall, the fitment and construction were great. The predrilled holes lined up and the install came out clean.
Wow, that looks so nice! Perfect compliment to the rear of the car without being gaudy or over the top. Nicely done!
Thanks!
i’m going to build rx7 so i need your helps and advises so can can drop me a mail.