After I originally installed the AiM dash and reassembled the interior, I couldn’t help but feel that an opportunity was wasted in regards to the cigarette lighter. I don’t smoke and keeping around a cigarette lighter is like treasuring a vestigial relic. The hole that the lighter resides in is the perfect location to install a push button for the starter, which, if we’re being totally honest, is equally as pointless but infinitely more cool. I kicked myself for having a lapse of laziness and avoiding the install previously, so I learned my lesson and will be doing it now.
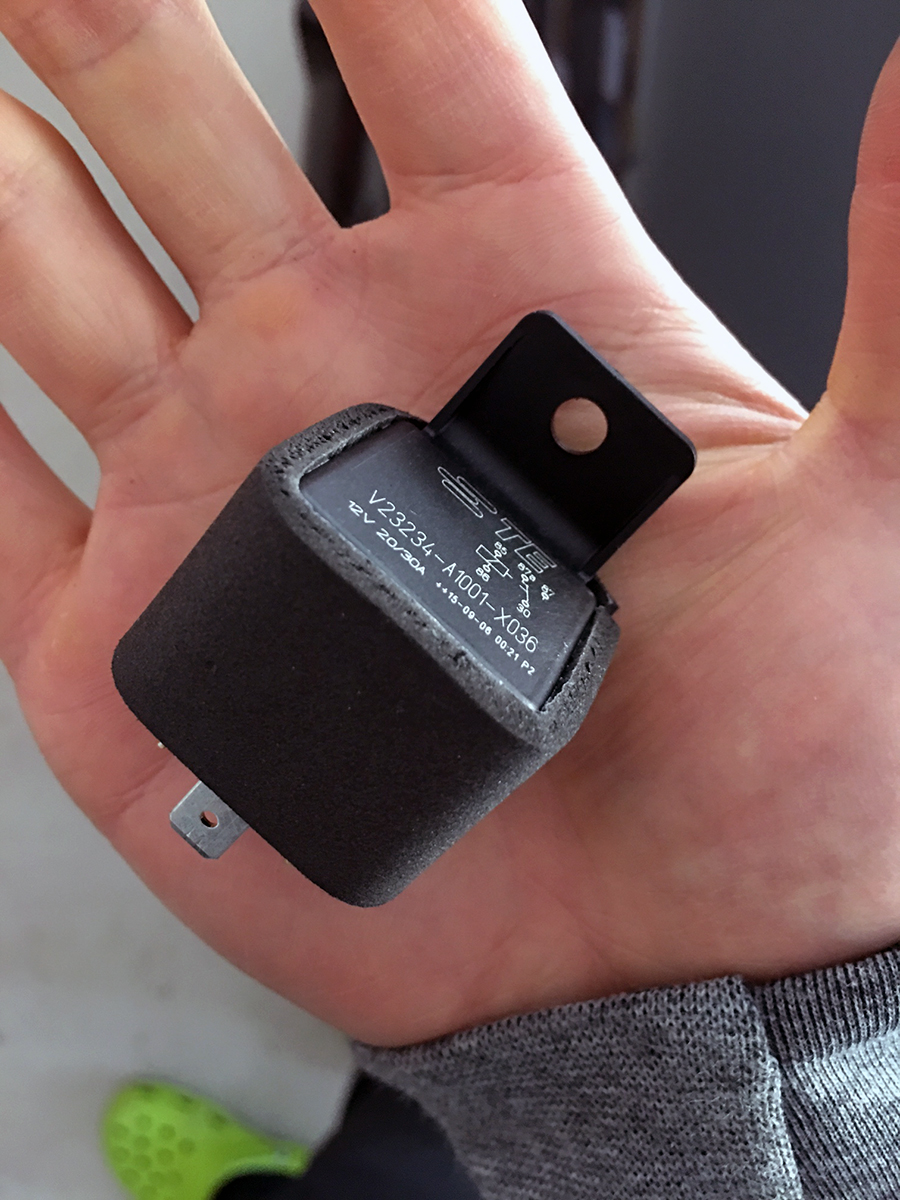
The OEM Honda S2000 push button is the popular choice to use. To get started, I purchased the button along with a matching connector and harness. A relay will need to be used as an intermediary and I chose to go with a Tyco Electronics 12V 5-pin SPDT 30A. And like the button, I also picked up a matching, pre-wired socket. Bosch used to be the namesake in automotive relays but later sold their division that produced them to Tyco.
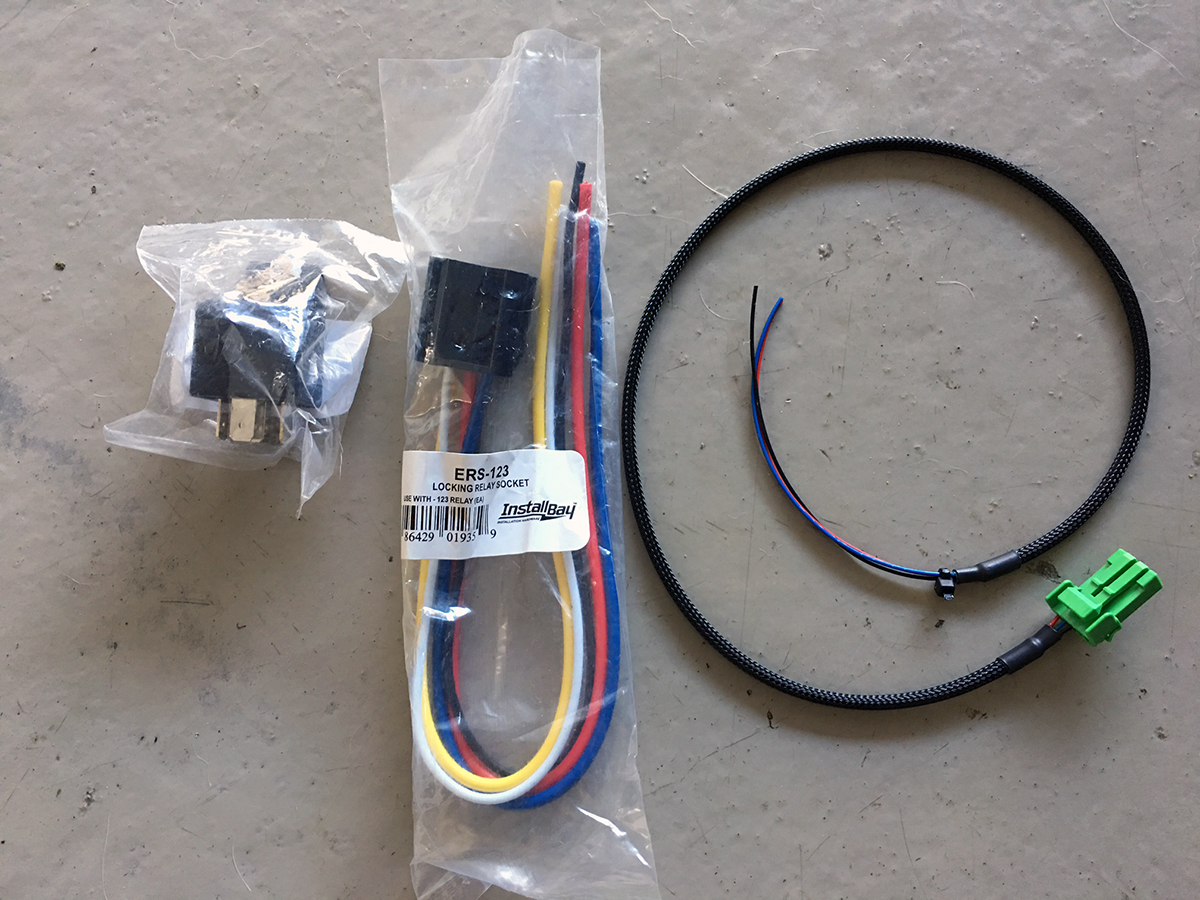
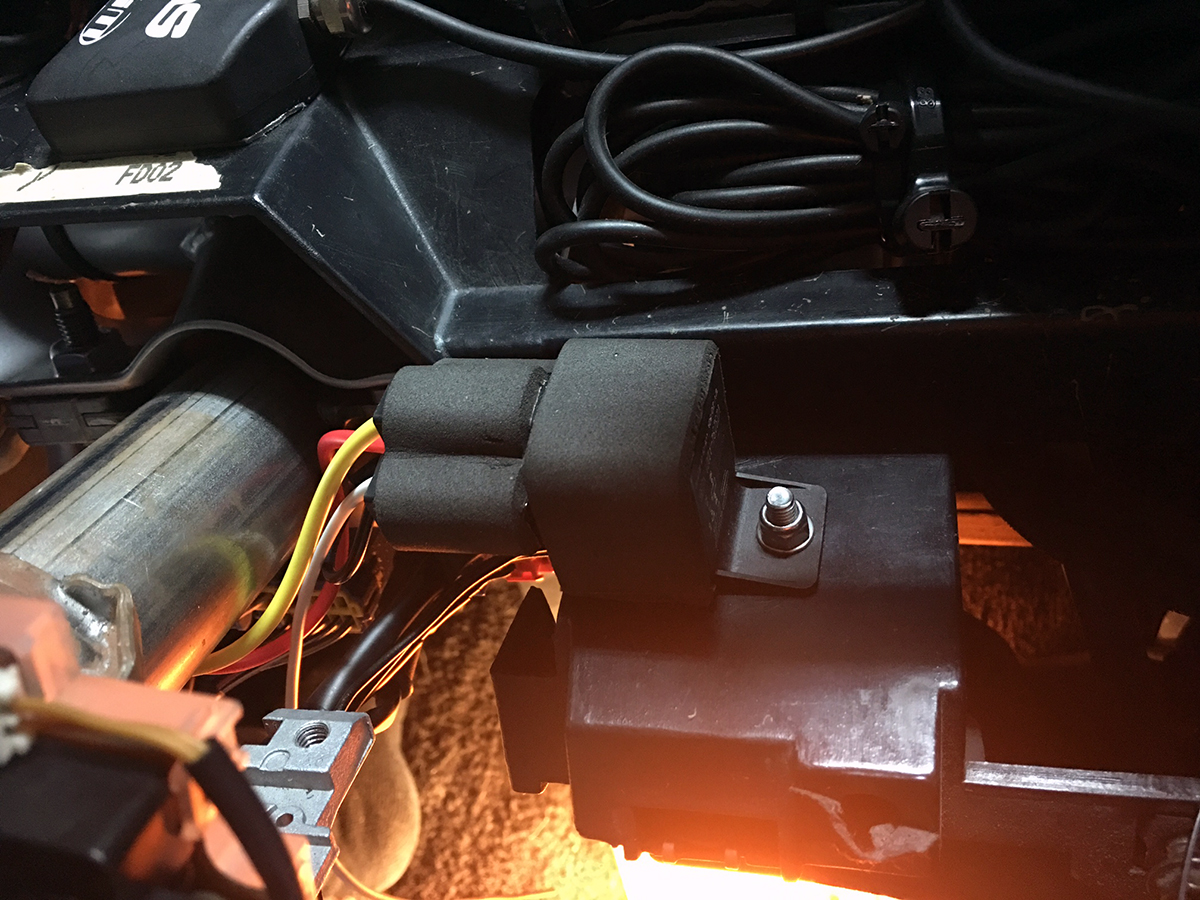
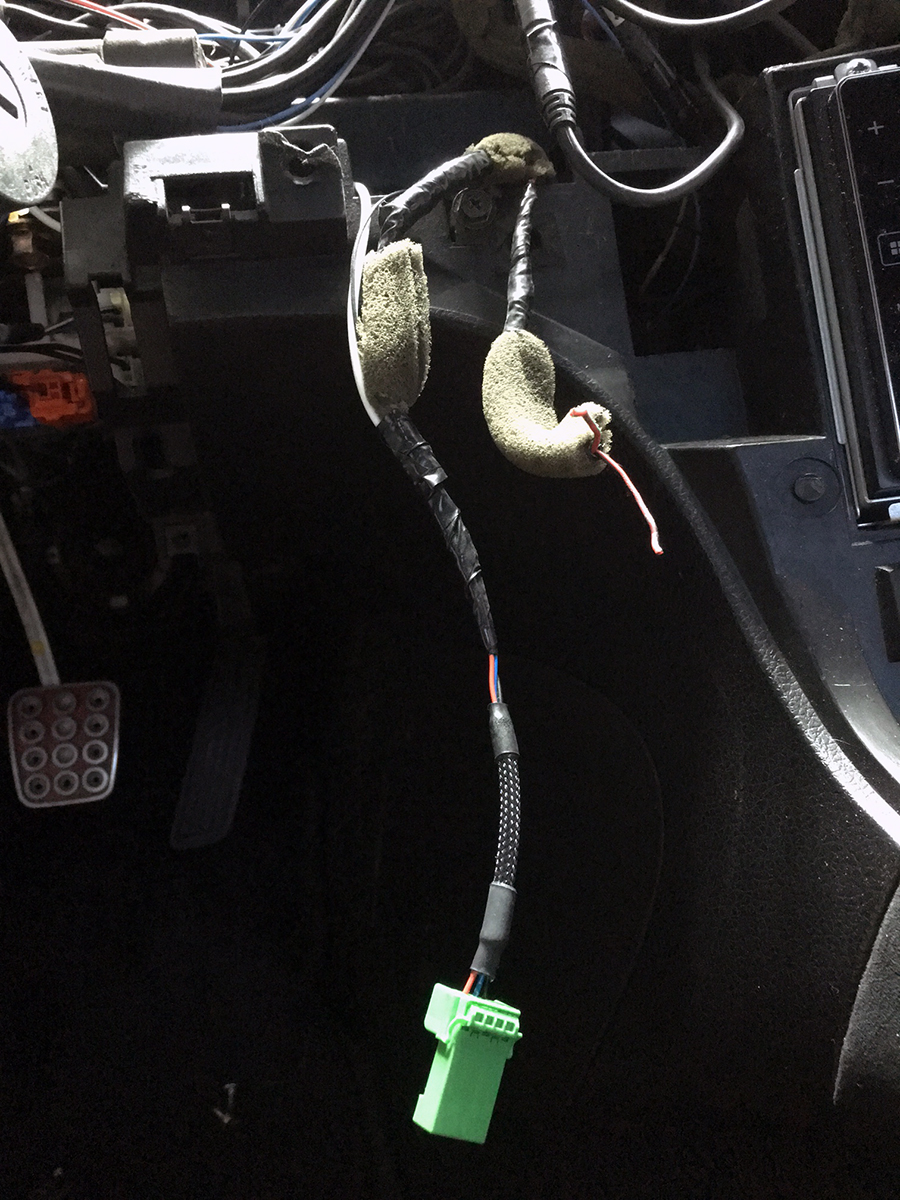
I cocooned the relay and socket in neoprene foam to help prevent possible plastic on plastic rattling.
I decided on this location on the dash shelf behind where the gauge cluster would be to mount the relay. I drilled a hole and used a stainless M5 button head with a nyloc nut. The relay clears the bracketry on the backside of the gauge cluster panel and is relatively accessible for future maintenance, should it ever become faulty.
Normally, I would shy away from adding complexity to the car but counteracted in this case. For my particular install, I wanted to go into greater depths and keep a couple preconditions. I didn’t want the push button to supersede the function of the key start, but rather work in conjunction. The push button also has a small light inside that turns on and I wanted its behavior similar to that of an S2000’s native environment – where it only turns on when the key is inserted and then turns off once the car has started. Having the light stay on constantly would not be preferred because referring back to the start button when the car is already on is unnecessary. Wiring light to the interior illumination circuit would mean it only turns on when the driver manually turns on the car’s lights. The best and easiest solution is to wire the light’s power wire to a constant 12V source – and then tap its ground wire into the ground from the e-brake handle. Why? When the car is parked and the e-brake is engaged (unless you’re one of the weird people who only relies on leaving a manual car in gear when parked), the light from the button will be lit once the key is used. After the car is started and ready to drive, and when the light is no longer required, the e-brake is disengaged and the light goes away.
To achieve the output I desired, I consulted with the resident Electrical Engineer of the NoRotors community, Lane HalfSpec, who was helpful in clearing up a few technicalities. With his advice and various push button write ups found on the web, I was able to concatenate the findings into a clearer and more personalized direction. After I made all of the wiring connections to the ignition harness underneath the dash and finished buttoning everything up, the push button failed to engage the starter. The relay clicked every time the button was depressed, so it wasn’t a problem from that end.
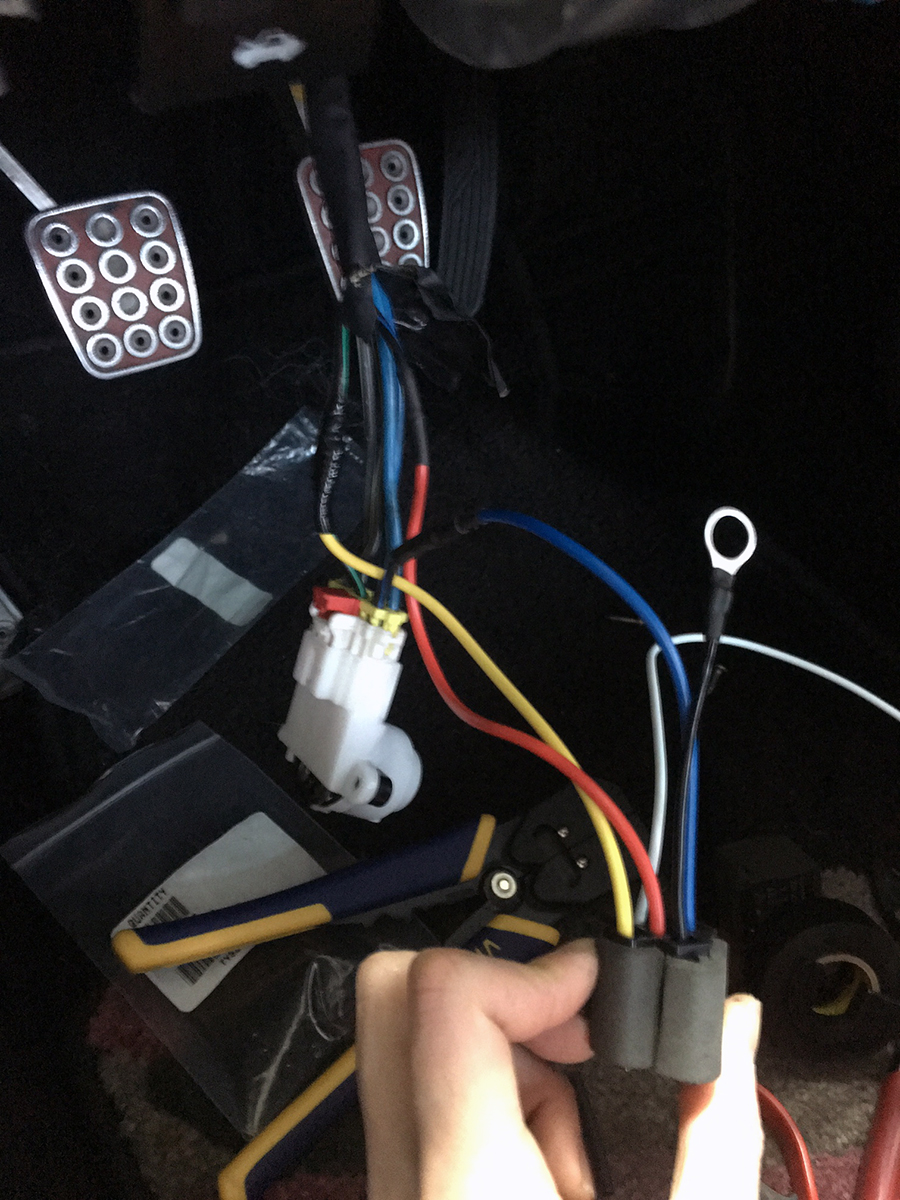
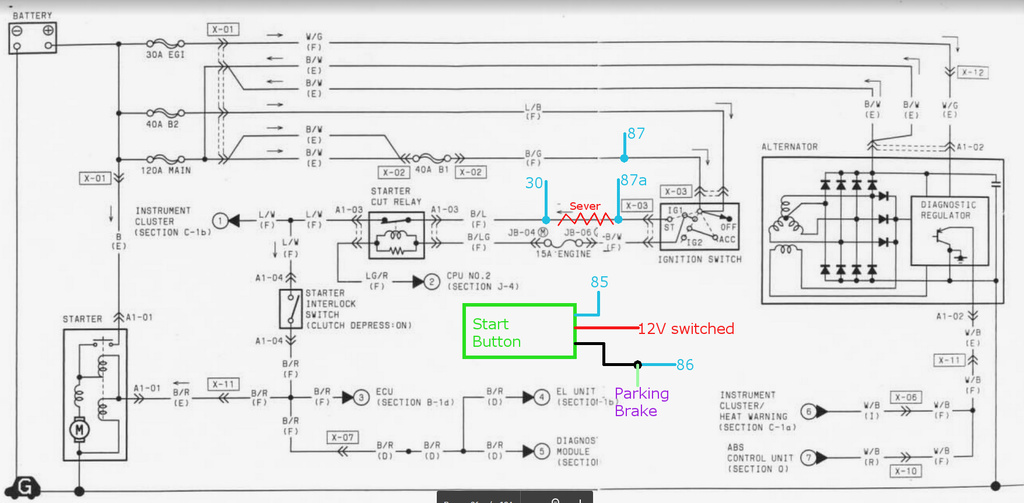
After scratching my head for a bit, I referred back to the wiring schematic that was created for my purpose and realized that the starter wire was mixed up. The problem was, I was cross referencing another guide that wired position 87 to the starter wire, whereas I wired my 87 to the ignition wire. Since relays do not have polarity, that didn’t matter… but what did matter is that I wired my position 30 to the wrong side of the starter wire. When the relay’s coil is energized by the push button, position 87 and 30 are connected, and in the end, the wiring harness side of the starter wire and the ignition wire need to be connected together.
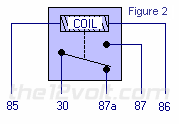
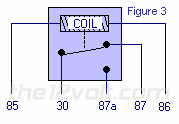
It wasn’t until I realized that the other guide was dealing with the starter wire and that I was dealing with the ignition wire. Once I figured that out, my mistake was apparent and the fix was easy. I disconnected the relay socket, depinned the 87a and 30 connectors, and then swapped their places back into the socket. Presto.

Here is the wiring schematic for my application, modified by Lane. For position 86, which is the ground, I crimped on a large 3/8″ ring terminal and hooked the wire to one of the bolts holding up the steering column to the dash. This is a beefy ground point and I figured it would be more robust than using the small ground wire off the e-brake, as indicated in the diagram.
I will rundown and summarize all of the corresponding relay connections.
- 85 -> Power Wire on the Start Button’s harness (outermost wire).
- 86 -> Grounded with a ring terminal to Steering Column bolt.
- 87 -> Black/Green ignition wire off the connector going to the ignition switch.
- For 30 and 87a: Sever in half the Black/Blue wire off the ignition switch.
- 30 -> Connect to the end of the severed Black/Blue wire going TOWARDS the rest of the harness/firewall and AWAY from the key.
- 87a -> Connect to the end of the severed Black/Blue wire going TOWARDS the key and AWAY from the rest of the harness/firewall.
To reiterate, I connected my 30 and 87a the wrong way and had to flip them. Don’t make this mistake.
Now, the remaining connections need to be done from the button’s harness. There are only 3 leads coming off of it and looks similar to this:
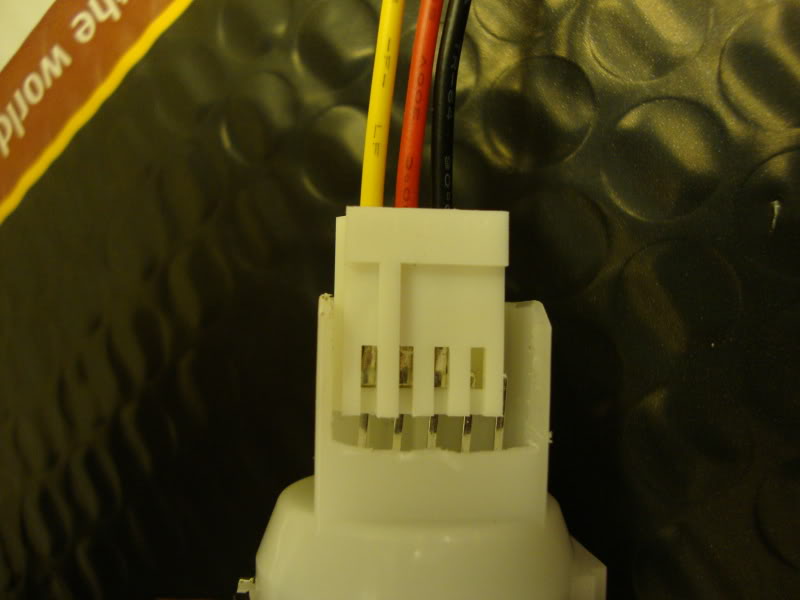
From the picture above, you can see that the 3 wires are an Outermost wire (yellow), Middle wire (red), and Innermost wire (black). Here are its summarized connections.
- Outermost wire – Output -> Position 85 on the relay socket harness.
- Middle wire – Power for the button’s light -> Any switched, illumination 12V source. I used the power wire from the cigarette lighter’s light.
- Innermost wire – Ground for the button’s light -> Ground wire off of the e-brake handle.
Make all of these connections and both the key and the button will work to start the car, and the button’s built-in light will only illuminate when the e-brake is up.
I did this a few years back for my 2005 Si, afhkparts.com had created a wire harness for the S2k pushstart that you just had use a female T-Tap and tape into the ignition switch, I wonder if this would have made things easier.
Yep, using T-Taps or posi connects can certainly be done and is one way of doing it and is much easier. I personally didn’t feel comfortable using taps, so I did it this way and with the traditional solder + heatshrink.
would you sell the cigarette lighter and assembly?
I can, shoot me an email through the Contact page
I am not so versed and I think I m having the same problem tiubhave with the relay clicking when pressing the start button. You said to swap pin 30 & 87a but I used a 4-pin relay. Also I have a 1996 Honda Civic and the colors you said aren’t matching up. I need help connecting this push start. I purchased a harness to save me all this troubles but I am still stuck .