It took me a full week to be able to cross the finish line with the roll bar install. I have no idea how some people can claim to perform an install in a single afternoon, there are simply too many pieces and steps to attend to. For certain, I have gained proper perspective on the difference of buying new versus used… the latter requires higher involvement and costs. Not only did I have to send the roll bar out for fresh powder coating, I was missing the pair of plates for the front mounting points and their associated hardware. If I had a time machine to go back a few years, I could have purchased this roll bar equipped with new paintwork and all hardware at a much cheaper price!
None of that matters significantly because this M2/Raceshop roll bar is unquestionably the best package offered for the Third Generation RX-7. My assessment carries validity because I’ve installed and been through 3 roll bars! But if you don’t believe me, allow me to run you through some of the details.
Picking up where I left off in the last post, with the roll bar positioned inside the cabin, I needed to figure out how to actually bolt it to the floorboard. I drilled 3/8″ holes, but as aforementioned, I was missing the bottom plates to fully bolt it in. I traced out cardboard templates and tried going to a local laser cutting facility and then a machine shop. The former could have made quick work of tracing out the cardboard and laser cutting a sheet of steel, but they were unwilling to take on a small side job. The machine shop was willing to do it the old fashioned way, but ended up being busy and made me waste a day waiting. I instead relieved a sheet of steel from the machine shop and took my cardboard templates back to do it myself. I explicitly chose to use a sheet that was thin enough to have malleability when torqued down in order to contour to the uneven shape of the floorboard. I read that Raceshop included overly thick plates originally, which gave users problems and gaps.
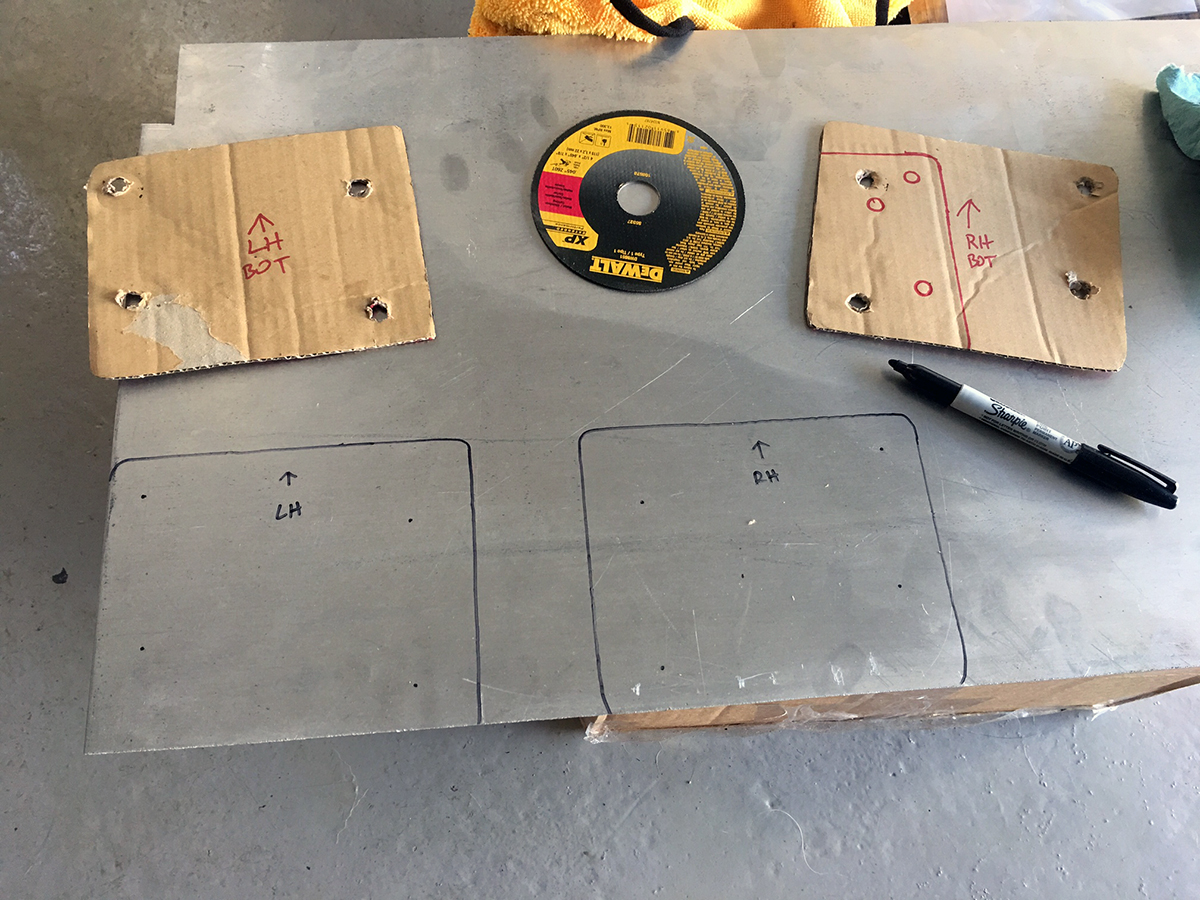
The reason why I was trying to outsource the work in the first place is because I know this would be extremely simple for someone with the right set of tools. It is also easy for me to do it the “backyard” way, but time consuming. Still, better than waiting around for people’s false promises because I’m at least willing to put in the work.
And by backyard, I literally drilled the holes for the plates on top of that box in the above picture and then cut them out with an angle grinder in my backyard. I hand filed and beveled the edges before sanding everything down to prep for paint. I threw on a couple coats of primer and then black bumper paint, again, in my backyard. It just goes to show that many tasks can be accomplished by modest means and simple tools (although I still want a legitimate fabrication setup… someday).
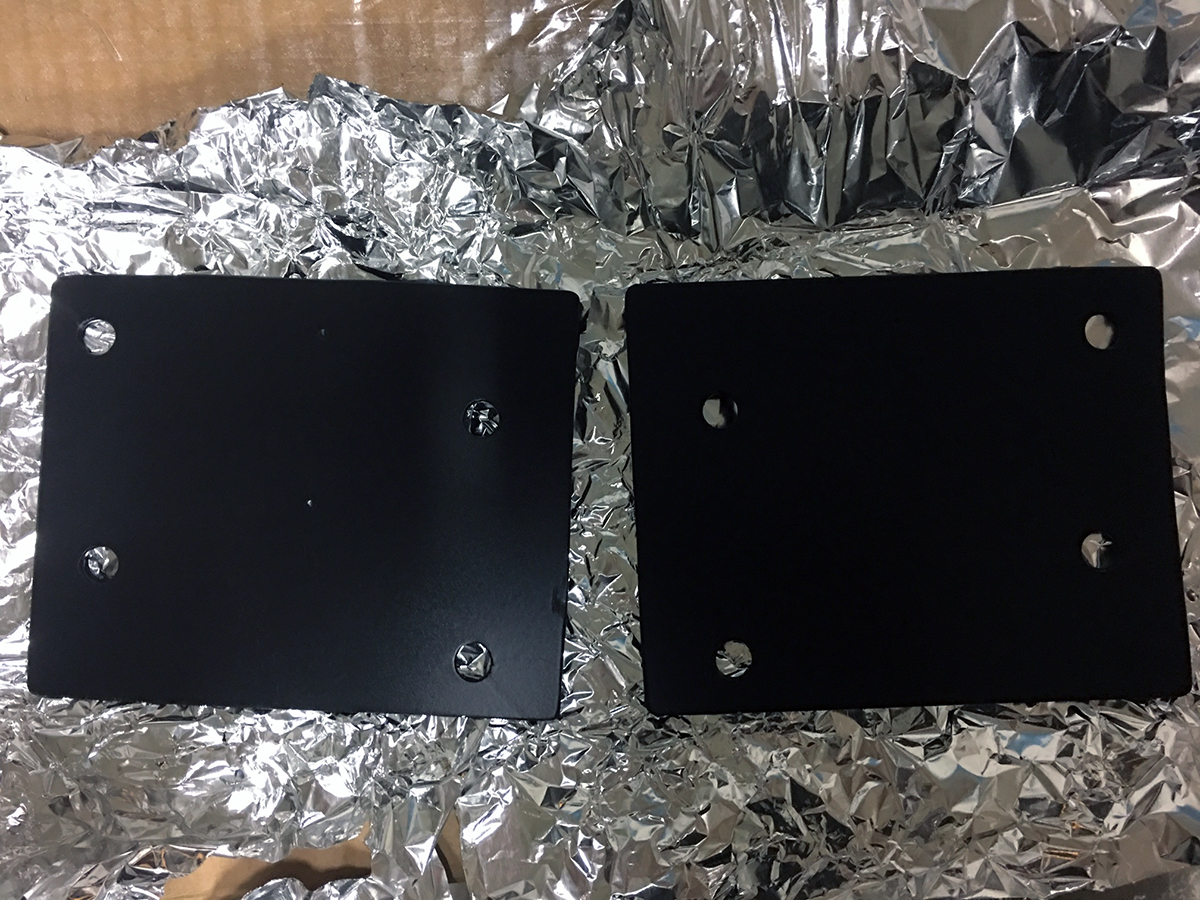
The aluminum foil is there because I warmed the plates in my oven to help with the curing process. It was getting late by the time the paint was sprayed on and the temperatures were dropping. I was also in a rush to get these on the car that same night, so I needed the paint to be cured enough to handle.
Previously, I made a trip to the hardware store and amassed this collection of fasteners. The bolts and nuts are Grade 10.9 and the washers are Grade 8.

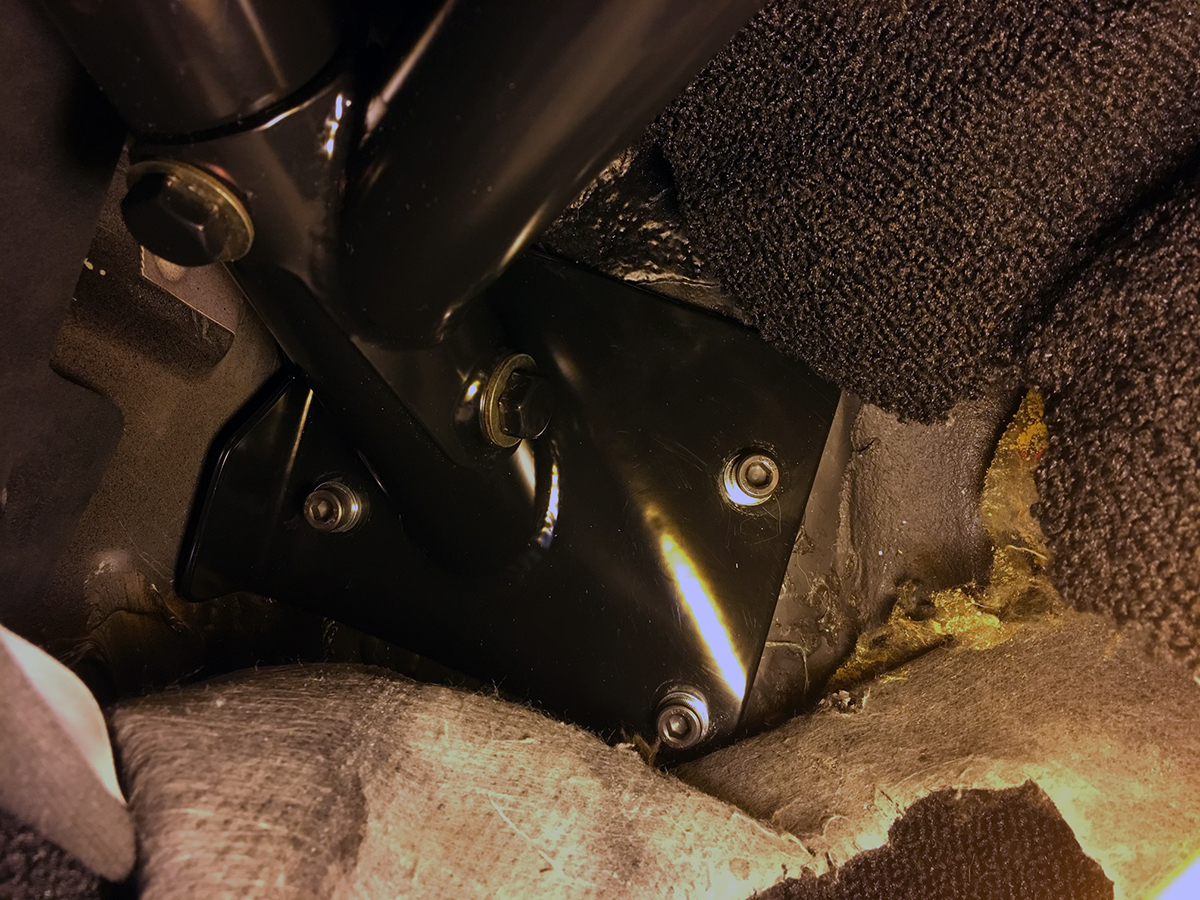
I was able to drill 3 out of the 4 holes per side from the top, but needed to drill the 4th one from the bottom via the cardboard template. I made sure to lay down a coat of paint around the floor board holes to prevent rusting. Eventually, the roll bar’s front points were bolted down.
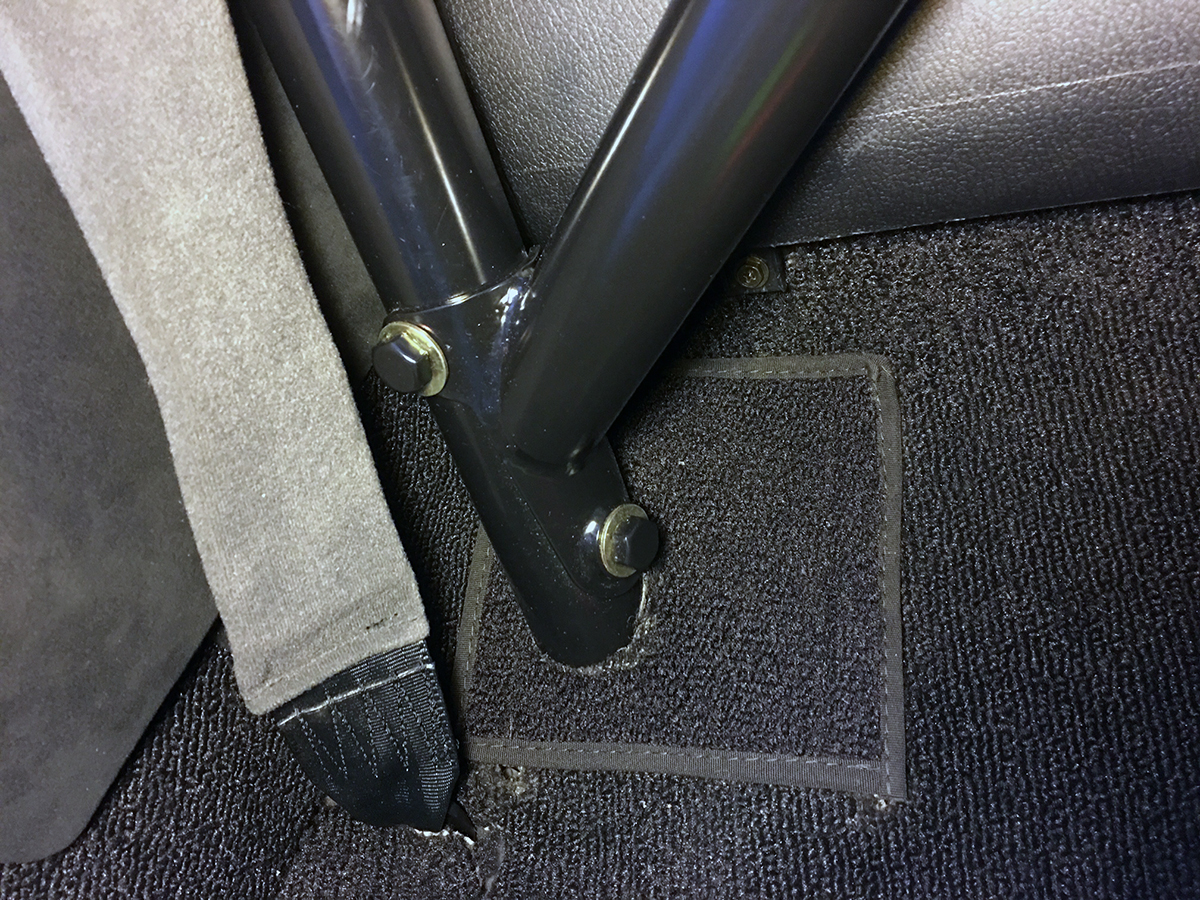
The next step was to put the carpet back into place since the feet needed to sit underneath it. I also made these patches with matching black carpet and bordering to tidy up the area. The original owner cut the carpet for the legs of an Autopower roll bar, which were more inboard than the Raceshop. This meant that the carpet had 2 adjacent slits per side and was starting to look a bit messy. The patches covers everything up nicely and provides trimming.
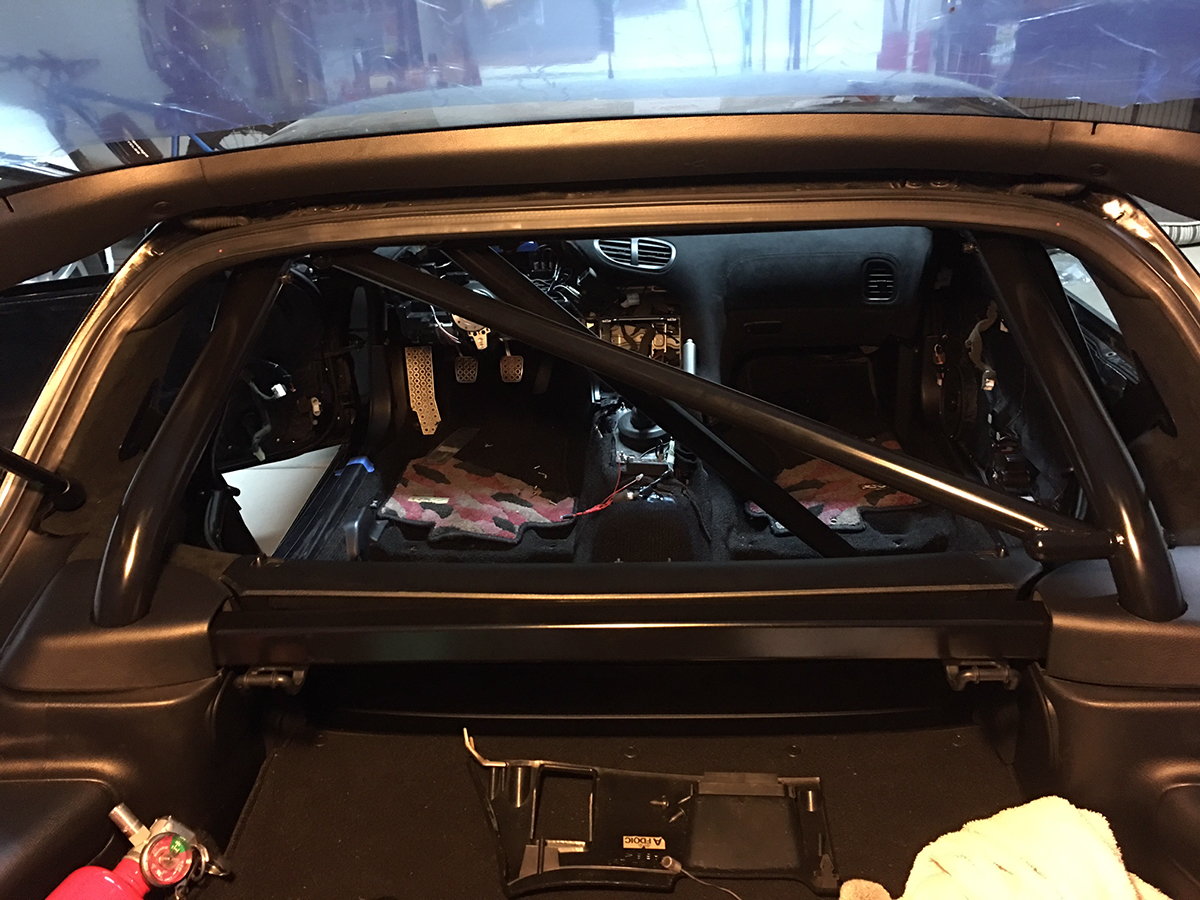
I then bolted down everything towards the rear. All of the tolerances with this roll bar were extremely tight… it basically goes together and sits one way. Affixing the rear legs, rear diagonal, and strut bar all required various levels of finesse and coercion. As a rule of thumb – the harder a roll bar is to install, the tighter and better it fits.
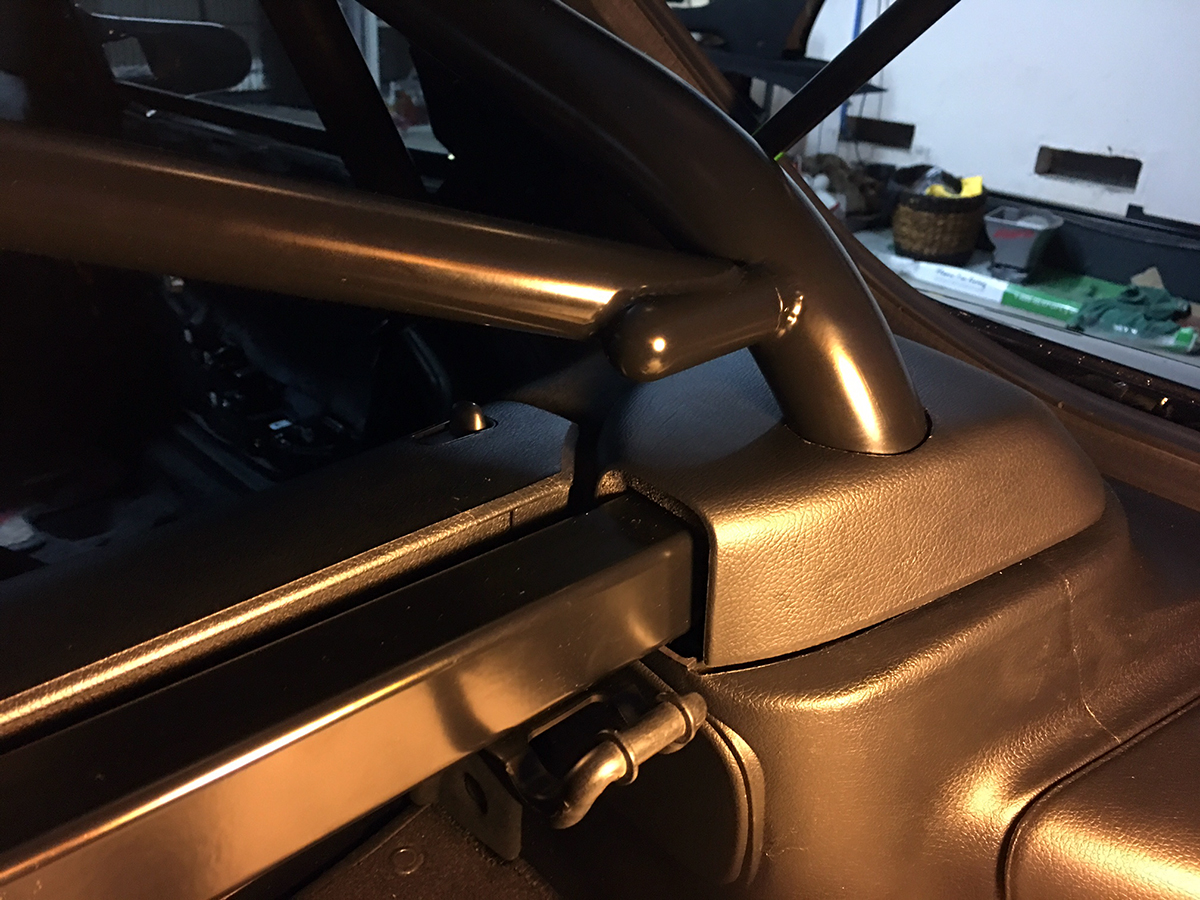
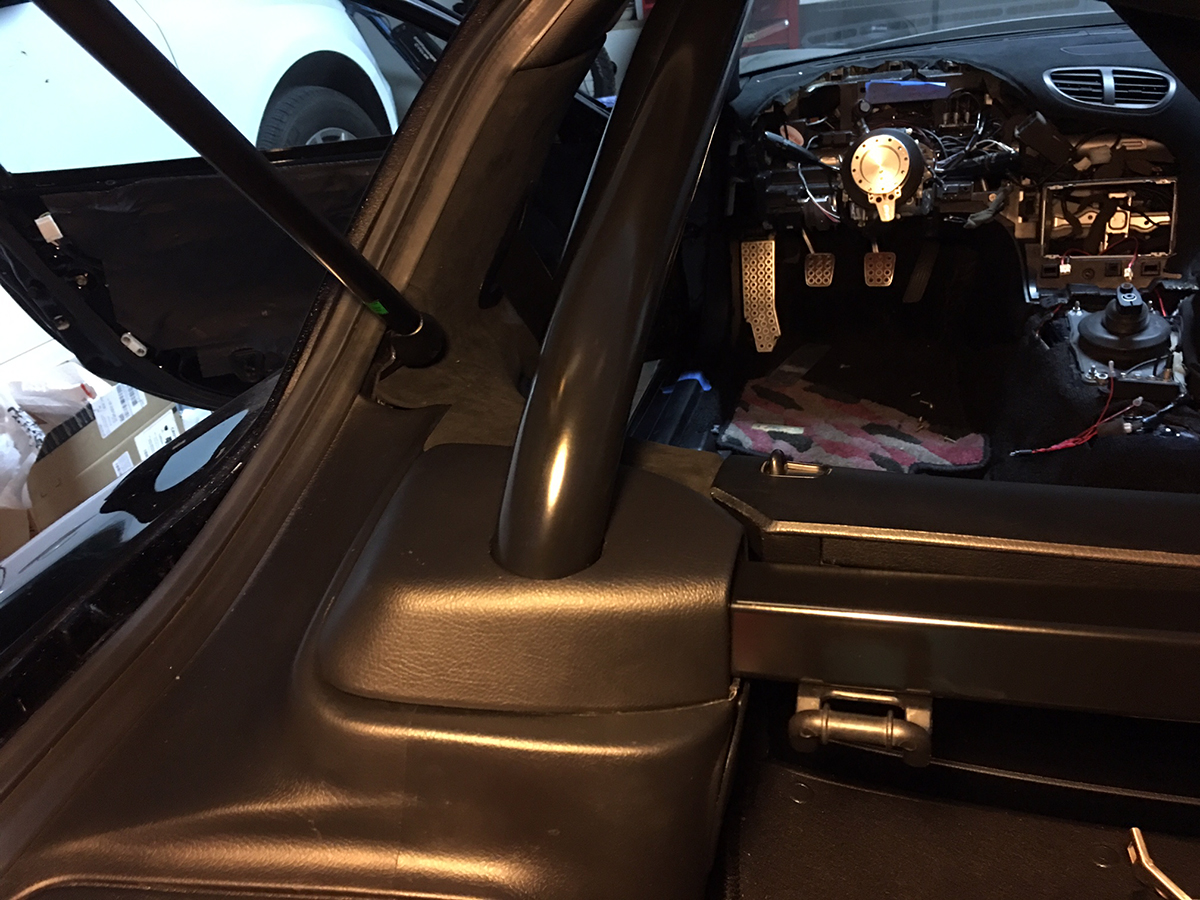
I was pleased when I snapped the strut tower caps into place. The holes I drilled came out clean and fit around the bars great, not bad for eye balling it since I didn’t have any templates to work off of!
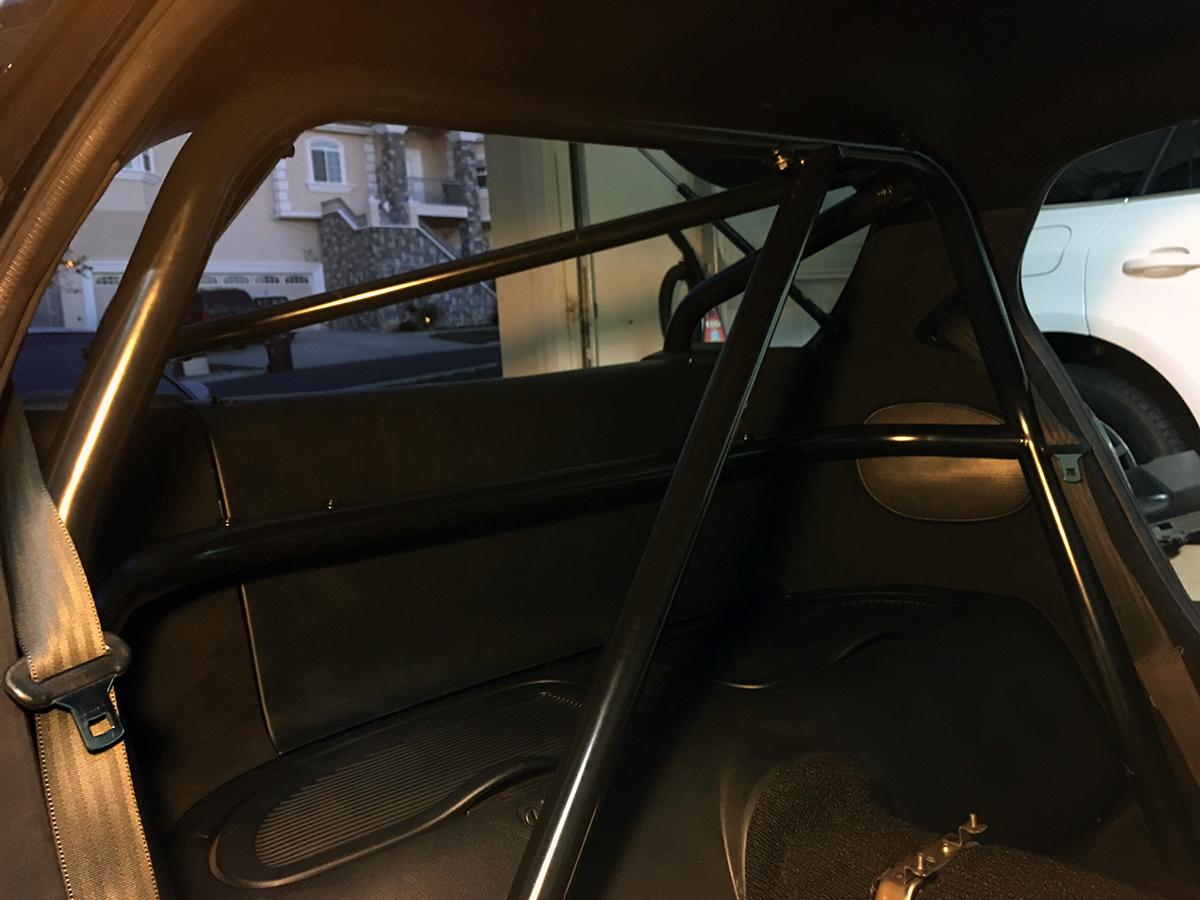
A view from inside. The hoop hugs the interior of the car very closely at the top and down the sides.
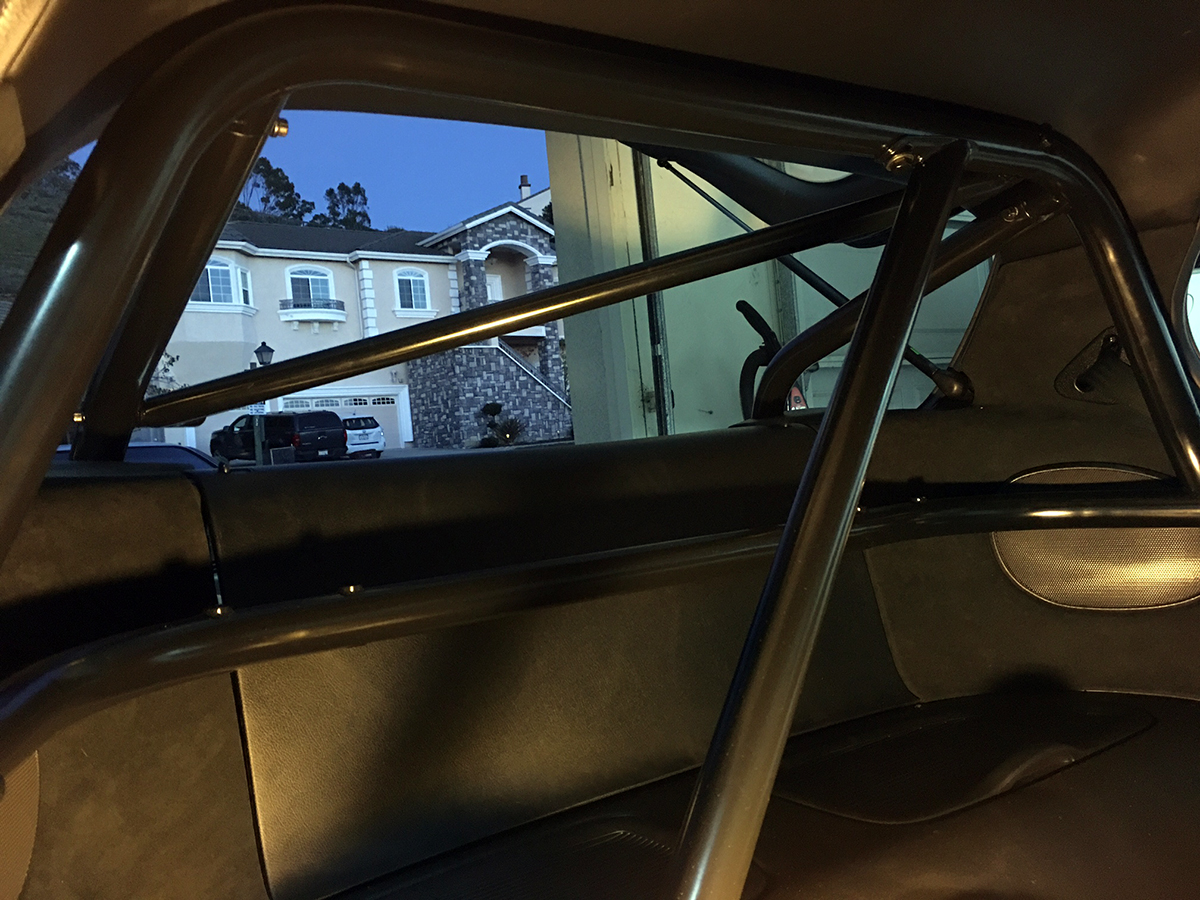
I am convinced that if Mazda or Mazdaspeed offered an OEM roll bar option, this would be it. The superior design work Raceshop incorporated is apparent. I tried to be too unique in the past, but my new direction is to keep the color scheme of the interior sedated. I think the black color will serve as a timeless and more universal choice.
With a breath of relief, I think I can finally settle down and close the chapter on what has become quite an epic during my roll bar trials and tribulations.
hi where can i purchase a m2 race bar for my fd rx7 .
thank you