The Dash Project was essentially a segue into a comprehensive interior overhaul. Since I had to remove the majority of the trim whilst working on the dash, I decided to go one step further and strip down each of the individual trim pieces. I felt that the black plastics were getting bland and decided to spice things up by having them repainted.
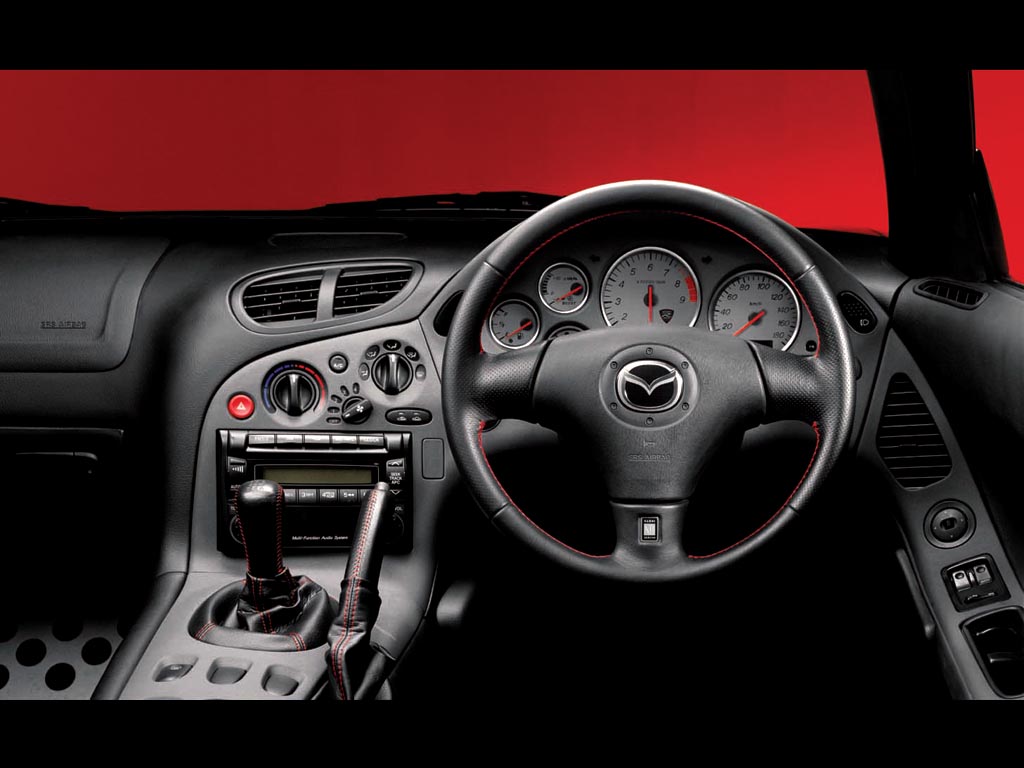
Initially, the goal was to administer a subtle change: I wanted to replicate the Spirit-R trim panels, which were a charcoal grey color.
To my knowledge, the Spirit-Rs feature a “soft feeling” paint on their trim pieces. This lead me to discover the Alsa line of SoftTouch paint, which seemed perfect for this application. Repainting a few plastic pieces appeared to be a trivial task at first glance, but by the series of events to follow, this was one of the most grueling and lengthy exercises I’ve encountered. To provide perception, I first dropped off the pieces to a local body shop (who performed a small job on my old Miata prior) over 3 months ago…
I shared pictures of the Spirit R interior and explained my desired color, a matte, OEM-like charcoal grey. A kit of the Alsa SoftTouch was then ordered. In the process of shooting, the SoftTouch paint wasn’t mixed properly and a few of the pieces would not dry properly. This meant a special paint remover, one that works with plastics, had to be ordered to strip everything down again for another reshoot. Almost 4 weeks later, they were finally ready for pick up.
Immediately upon my arrival to the body shop, I saw that the grey color was too light of a shade. I ended up paying for the job twice in order to redo them, and I also had to buy another kit of the SoftTouch paint (over $200 for just materials) because the first kit was expended. Fast forward to another 3 weeks of waiting for the SoftTouch to arrive, stripping the paint off again, and reshooting… the color ends up being too dark this time. At this point, I just took all the panels back home so I could have time and space to think about the next move.
I knew I still wasn’t happy with the results, even though so much time had been lost. I looked into other options, wrapping the pieces in vinyl came up as an idea. In the end, I opted for another repaint – with the exception of ditching the Alsa paint. I was going to stick to normal paint in a smooth, glossy, 2-stage finish. I also took the pieces to a different body shop this time around.
For the sake of brevity, I’ll keep this next section brief. From having the paint react poorly with the Alsa undercoat to me being unhappy with bumps and non-smooth areas, these pieces were reshot 4-5 times each at body shop #2. Although I required the work to be expedited, given the circumstances, this took another 3 weeks to complete.
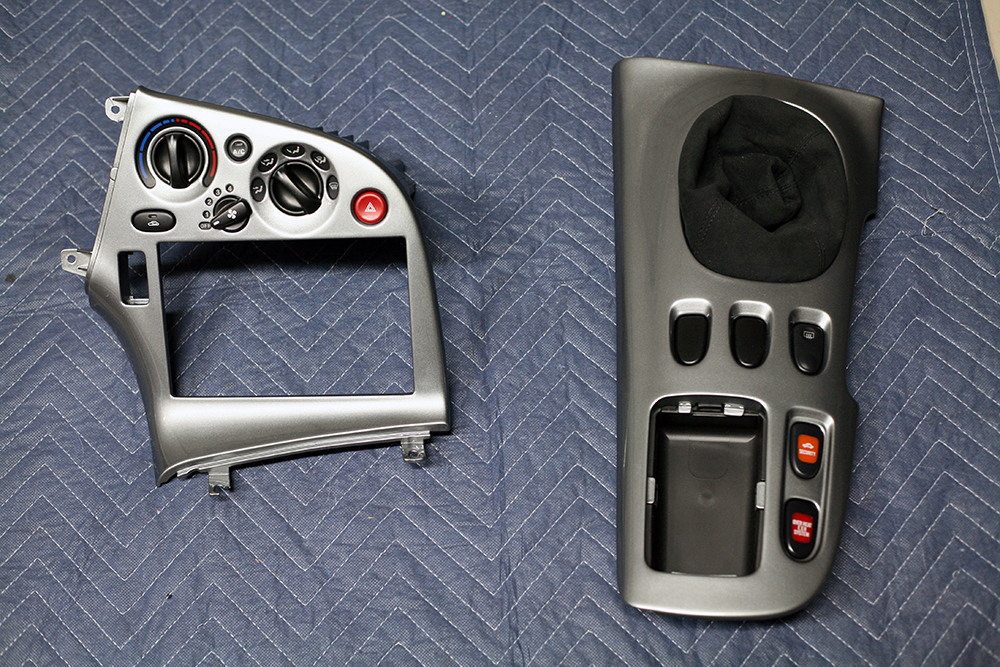
Now I finally have the pieces back in my possession and to my satisfaction. With the exception of the gauge cluster surround – I still discovered minor blemishes in its finish and they are repainting it once more. Ultimately, the color I chose to go with was a nice, metallic grey. Porsche “Meteor Grey”, to be exact. I think it looks stunning and the contrast it provides against the black interior helps to elevate the plastics’ perceived quality.
Pictured below are the shifter surround and climate control panel, all reassembled:
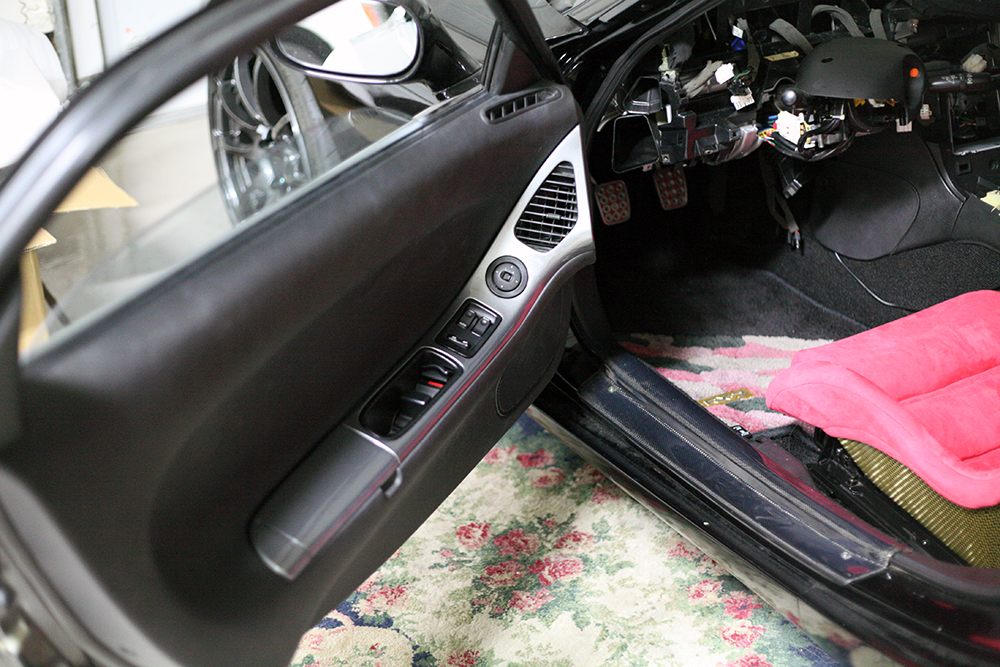
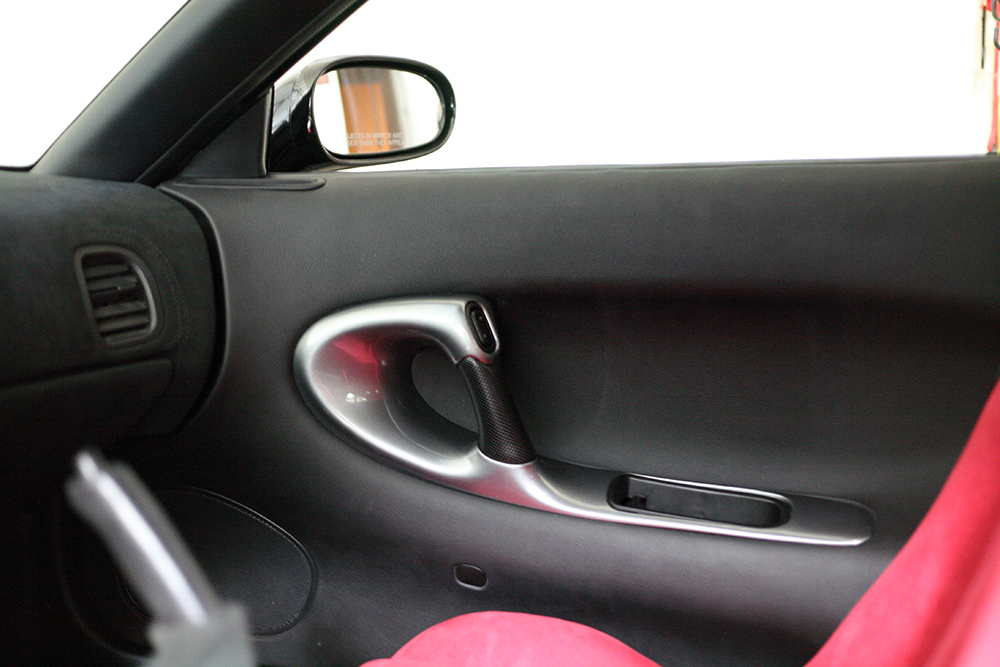
And the door panels reinstalled:
Fingers crossed that once I am able to get the gauge surround back, I can finally button up the interior and just start driving.
You know… there is something to be said for your dedication to quality. The final paint came out very clean and is very amazing when thinking of the trials that led to it.
Thanks man, it’s been such a huge pain though. I’m just hoping I can have it all back together and be done with this.
Hahaha for your sake me too!
Eric, we all know you’ll never be ‘done with this’. Nice color and finish.