After sacrificing entire weekends back-to-back with long and grueling hours on all days, I was eventually able to heat shrink the last splice, pull the final zip tie, and complete the packaging and wiring work.
Yes, my garage attire consists of oversized Fila waterproof pants and bright green Crocs. Go ahead. Judge.
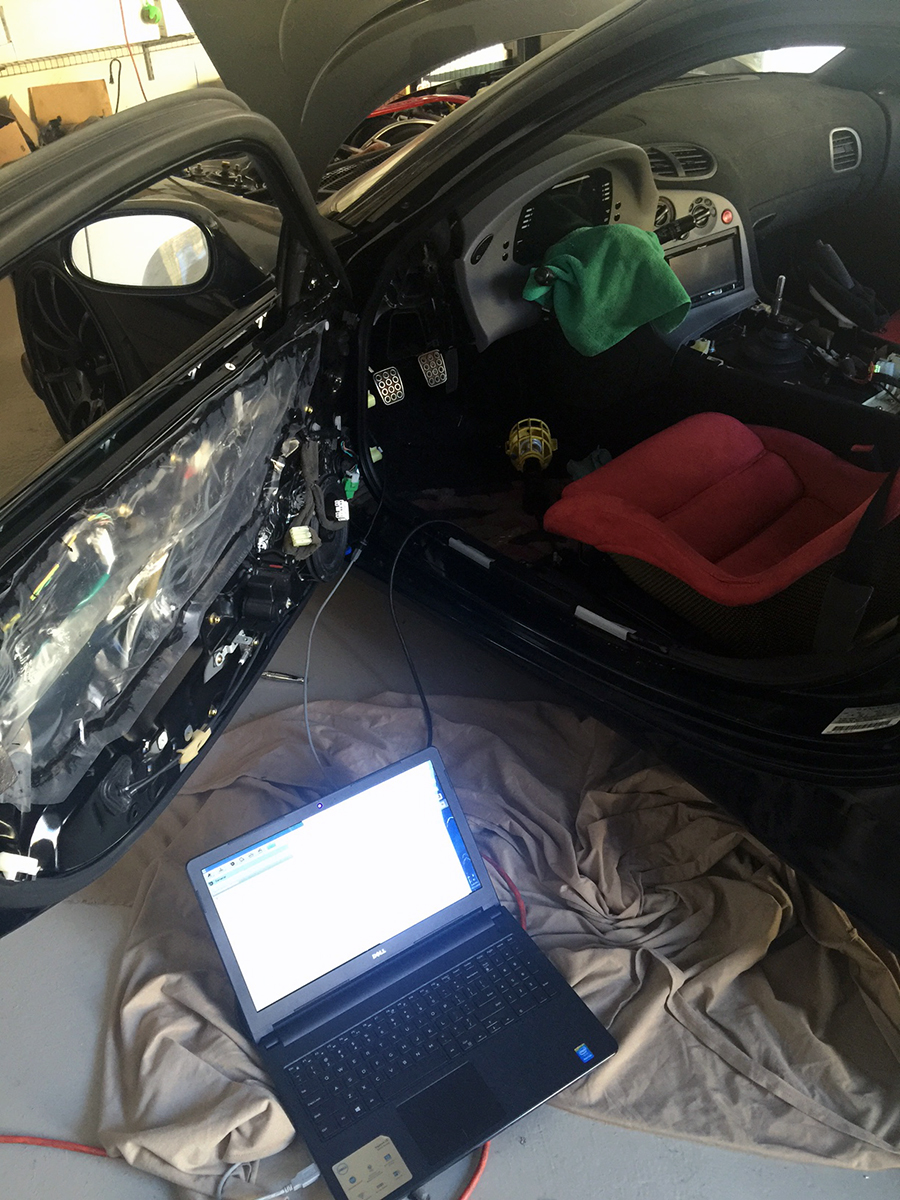
With so many different connections and devices that needed to be mounted, I wanted to ensure that the end result would be neat and tidy. I vacillated between a few different options before settling on the plastic dash framework directly posterior of the gauge cluster. There was a level shelf area that would serve a fitting location. I mounted the GPS antenna centrally here, flanked by the data hub and button relocation module. The channel expansion was the heavier and larger unit of all the devices, so I separated it to the center console area by the ash tray.
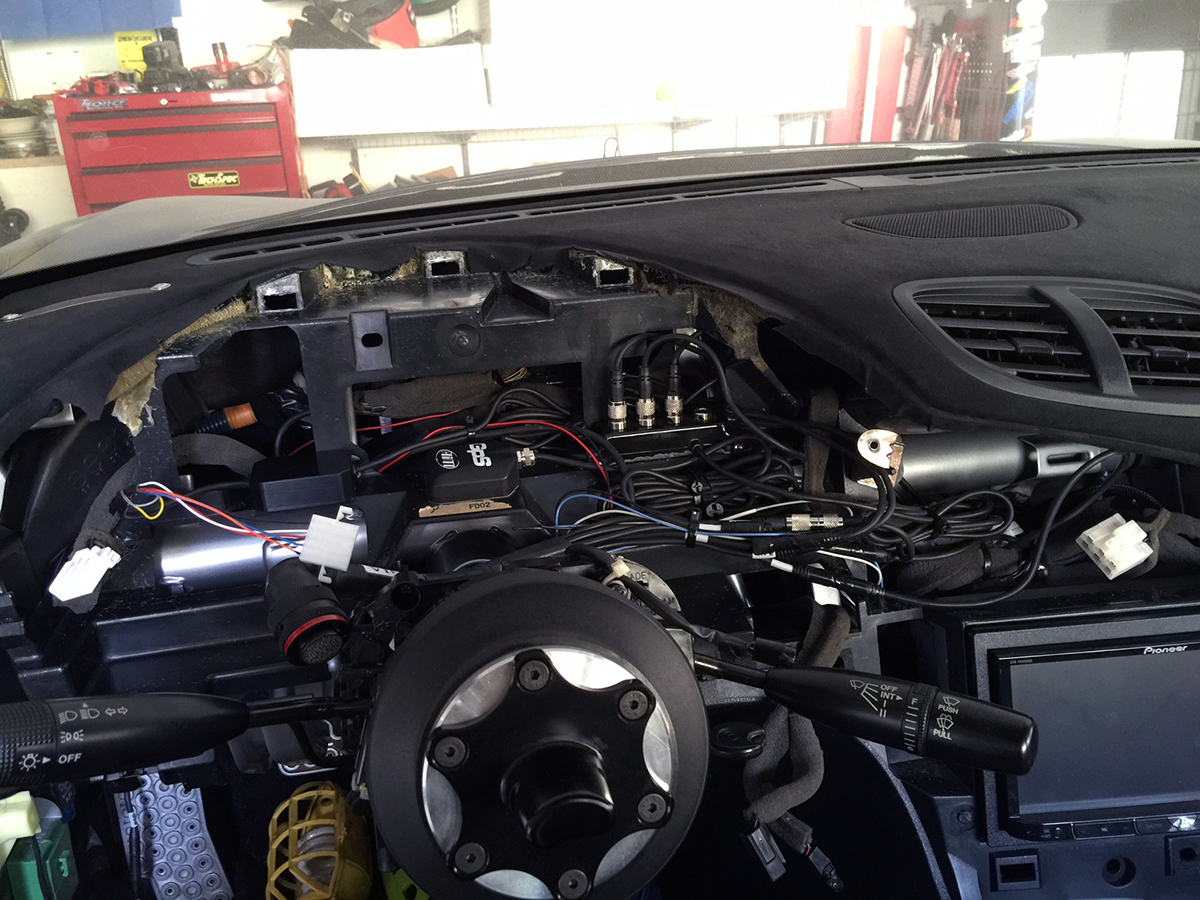
Although the gauge hood will cover everything, the GPS antenna still has a direct view to the sky through the windshield with the benefit of remaining hidden from sight. The signal will be able to pass through plastic, but structures of more complex lattices, like carbon fiber, may create obstruction.
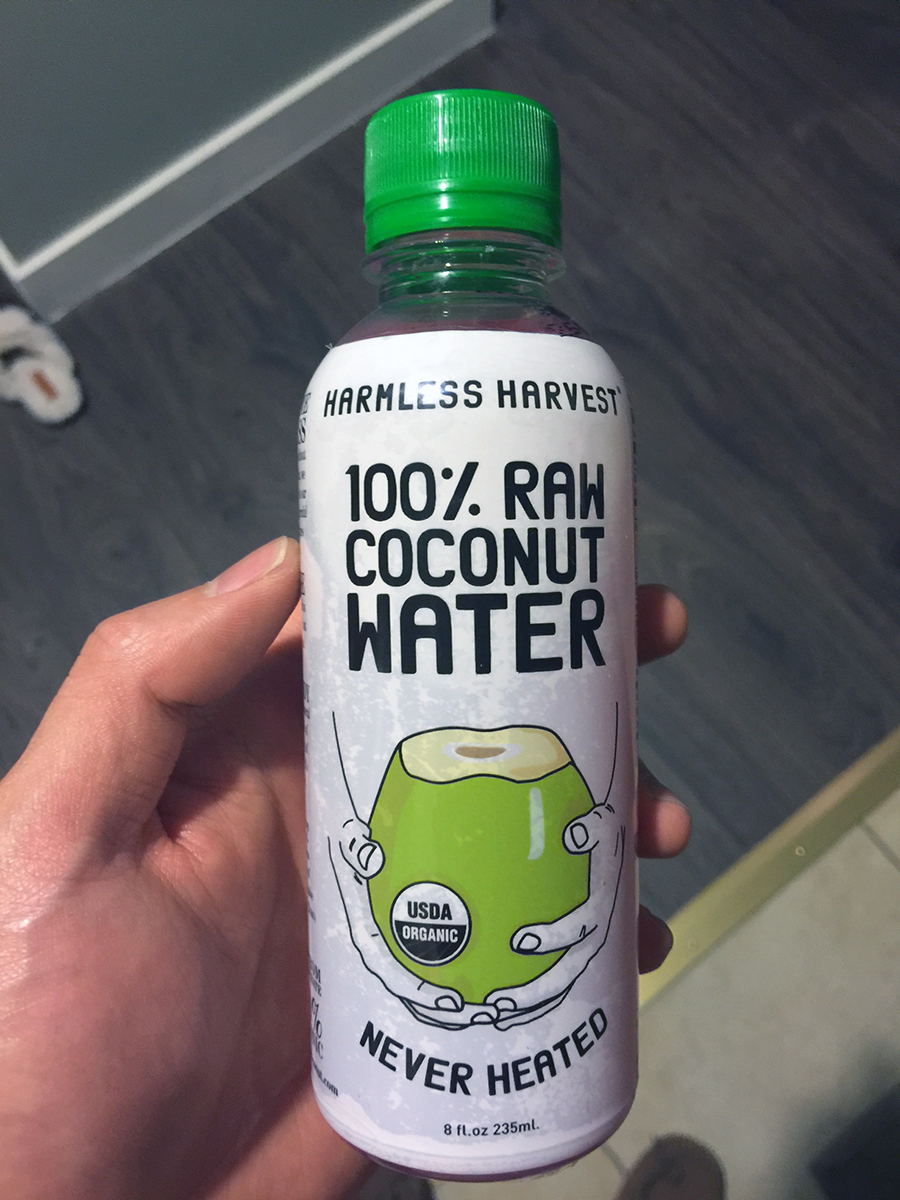
I drank coconut water during the downtimes to stay wholesome… great source of potassium and this particular brand treats the water with pressure instead of heat, which preserves the naturally occurring phenols. This is why some of the bottles have pink colored water.
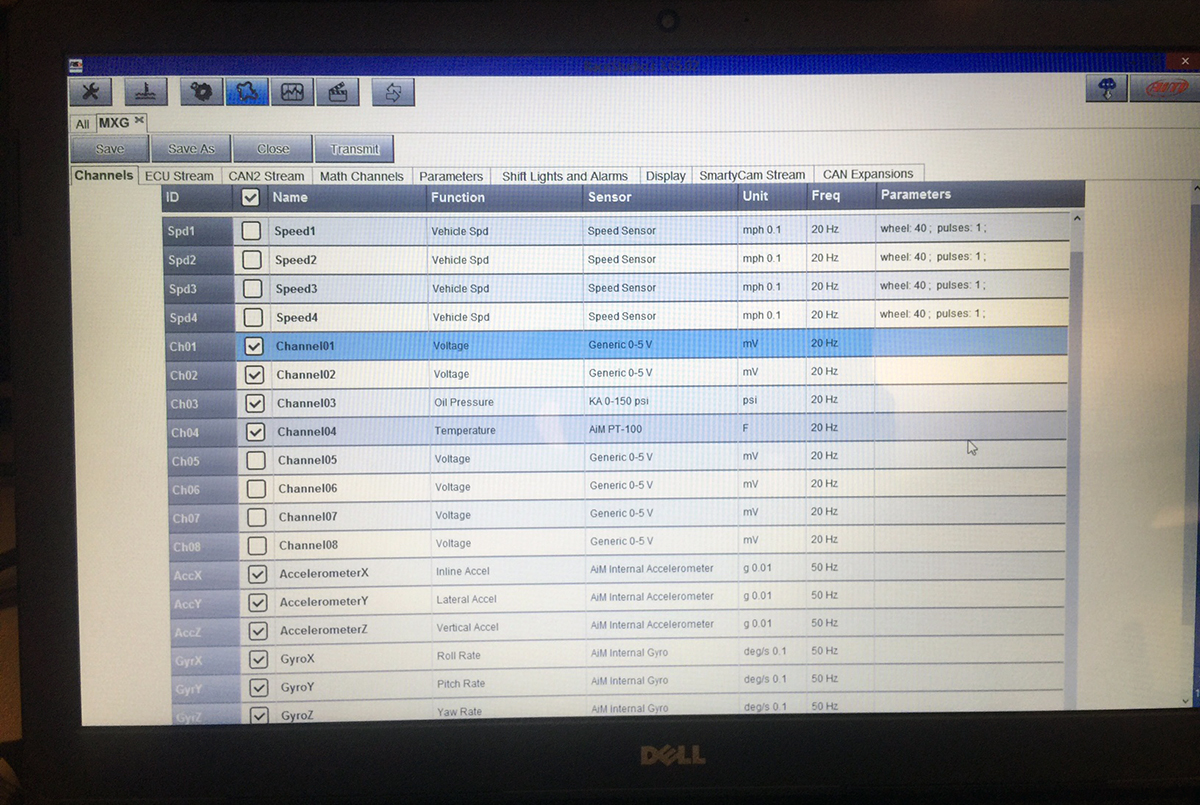
Back on topic – the next step was to start playing with the AiM RaceStudio software to preconfigure the dash. The software was quite intuitive to use and I was able to navigate through all the necessary setting updates with ease. The only downside was that it only supports Windows, so I borrowed a Dell laptop from work to run it.
I don’t consider myself an Apple bandwagoner nor do I indulge passionately in PC vs Mac debates, but I have had the fortune of using primarily Apple products over the past years.
With legitimized reason, at that. While wading through this Dell laptop, which was brand new out of the box, nonetheless, Internet Explorer froze or crashed on me multiple times. The touchpad was clunky and unresponsive. Applications loaded with noticeable lag. I cannot fathom how computers, in 2015, are still being sold at such a poor level.
Once the configurations were ready and saved, I found myself at the cusp of a climatical moment. It was time to plug in the MXG and determine if the countless connections I made would prove fruitful. I felt confident, but the idea of having to dig up all of the carefully routed wiring and troubleshoot a wrong splice was unsettling.
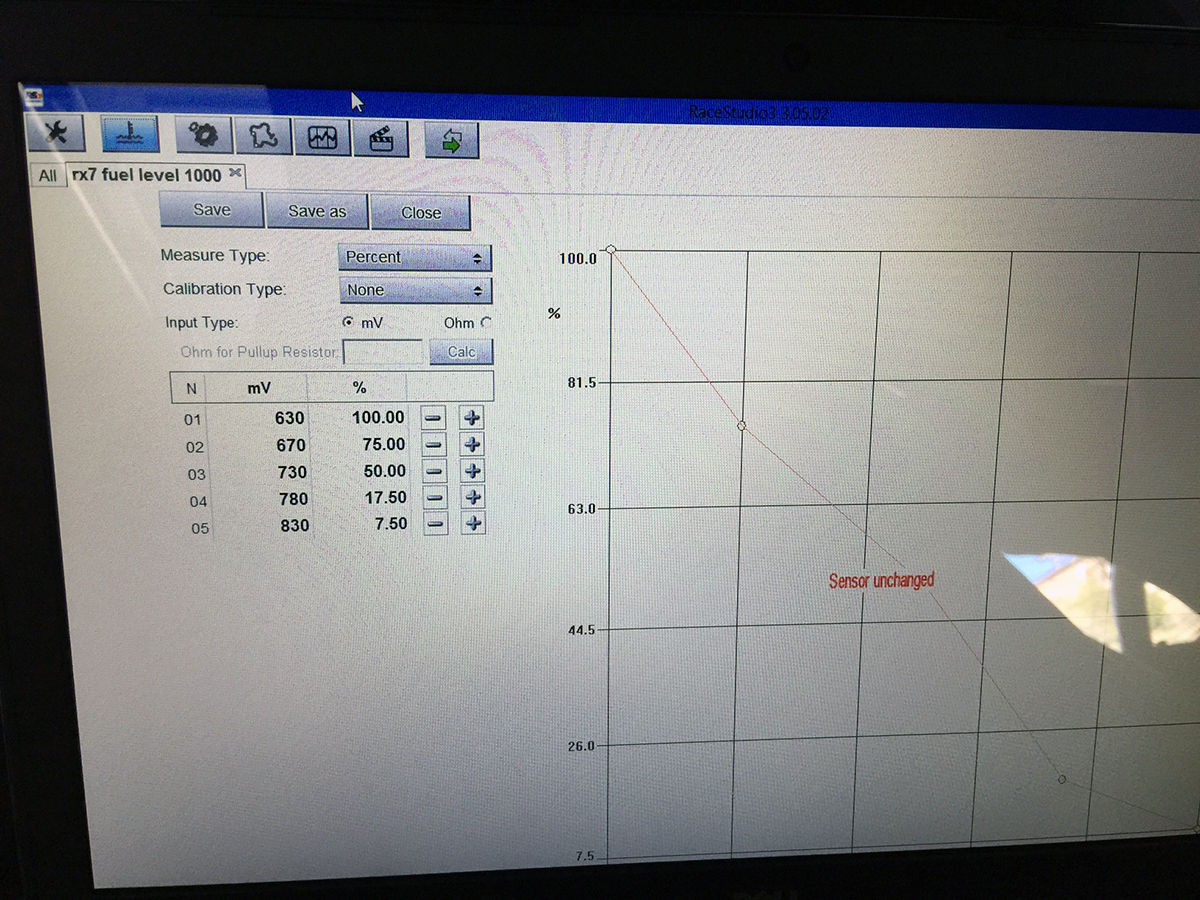
My concerns were laid to rest when the MXG powered right up at the turn of the key. I transmitted the configurations and the display readouts all appeared to be in working order – with the exception of the fuel level. This was the most intricate input as I had to use a patch cable with a built in pull-up resistor to convert the fuel level sender’s resistance signal to voltage. As I would later discover through my talks with Josh Hanrahan of AiM Sports, the 1800ohm resistor I was originally sent would not provide an optimal resolution for the sender’s designated 7.4-75.9ohm range. Instead, after working out the calculations, a 1000ohm resistor would give me more accurate values.
Josh has been an instrumental and invaluable help for me. He was kind enough, at my persistence, to drive to a local UPS store right before closing and Next Day me the 1000ohm cable so I could have it in time to install during the weekend. I did have to disconnect the dash and remove the old fuel level patch cable to splice in the new one. While doing so, I was even able to bug Josh on his mobile during a Saturday to run over another finding I came across: I validated the fuel level cable I was splicing into with my multimeter and it gave the correct resistance reading; however, the resistance turned into voltage once the ignition was turned on.
This threw a dramatic curveball because the custom sensor configuration that takes into consideration the sender’s resistance range became moot. It took an entire afternoon of tinkering and researching before figuring out a conclusion. At Josh’s suggestion, I proceeded to button everything back up with the new 1000ohm cable and reconnected the dash. I then utilized the Live View function in the RaceStudio software to view the fuel level channel’s apparent voltage value. I emptied the gas tank and slowly filled it back up at intervals, logging down the voltage values at their respective percentages to build a curve that the software could interpolate.
More in the next post.
Hello,I log on to your new stuff named “Interior Project: The Install Part III | Grand Mighty” on a regular basis.Your writing style is awesome, keep it up! And you can look our website about www free love spells.