In the background, I was busy accumulating parts and performing the necessary tasks for a brake system overhaul. In actuality, I had everything I needed and was ready to start on the work for quite some time now. Instead, and to be perfectly frank, I was content with letting the parts sit on my shelves while I enjoyed the downtime. As you may be aware from looking back a few posts, I haven’t been the most active lately.
In fact, I don’t think I even drove the car in all this time – aside from the occasional warm-ups. I pushed all car related matters and thoughts outside my cognition and perception, and let me tell you, it felt great… The single turbo project over the Winter was an intense affair and its comedown left me in a state of weariness. Tackling car projects with a high level of scrutiny truly requires immense motivation and dedication. It will test the stamina of anyone.
Alas, I found an impetus to end my “vacation” and carry on. Before diving into the actual installation, I need to start with a preface on the big brake kit. The RX-7’s brake system is generally very good and capable. However, this fact still doesn’t exclude it from being upgraded. My overall agenda with my car is to raise its standards holistically, while still operating within in the scope of Mazda’s original concept. As an analogy, I’m pursuing my goals in the same vein as Porsche did with their GTx RS cars.
With that said, I narrowed my decision for a big brake kit upgrade to the Brembo GT. Buying this kit new is prohibitively expensive, but I was lucky in being able to find a low-mileage set of calipers and rotor hats. To finish the puzzle and take care of the friction discs, I bought a pair of cross-drilled StopTech AeroRotors. The choice on going with cross-drilled over slotted was simply due to ballerness. It’s safe to assume that I will not be road racing this car in the near future, so the functional benefits of slotted versus cross-drilled are extraneous for me. In the similar mentality, I chose to go with StopTech Street pads all around for their balance of performance and low dust.
In order to mount the StopTech AeroRotors to the Brembo hats, there was a catch. The 2 companies use a different method to “float” their rotors and also use different hardware. Brembo accomplishes this by having a small, raised step that circumferences the backside of the hat. StopTech, on the other hand, accomplishes the task through the hardware and does not need the raised lip. So I brought the hats down to a local machine shop and paid the owner on the side to carefully lathe it off.
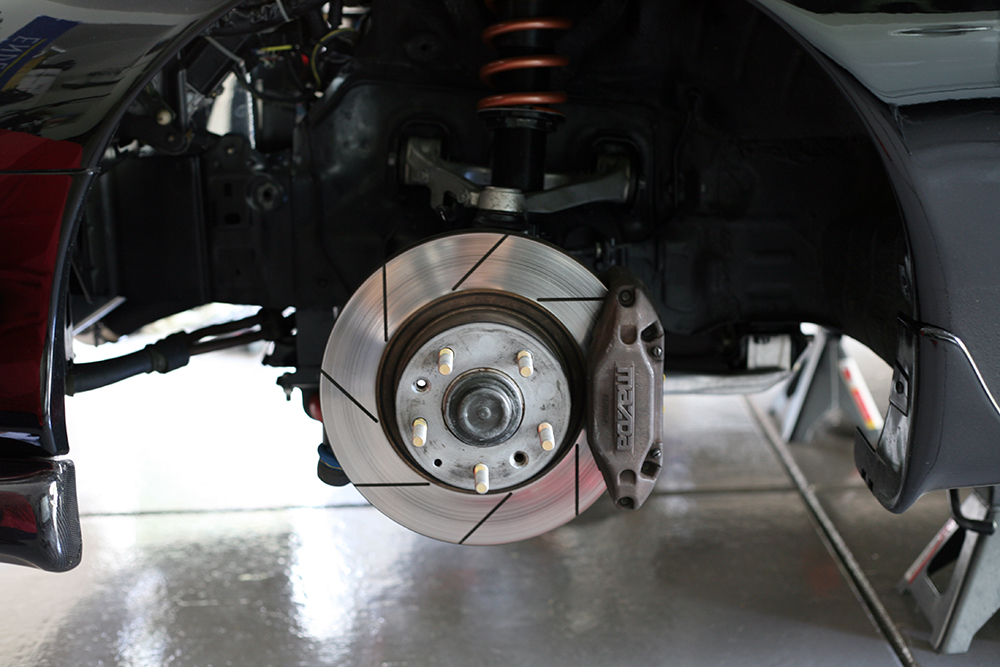
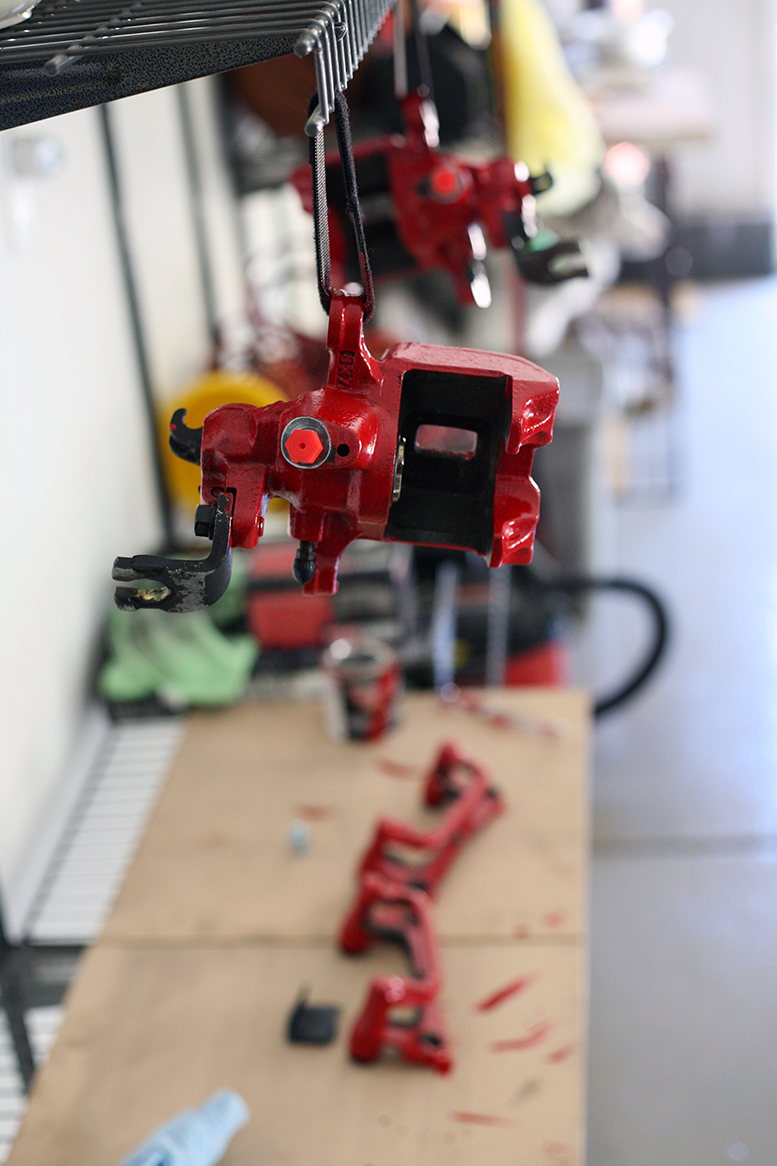
Here’s a look at the stock front brakes.
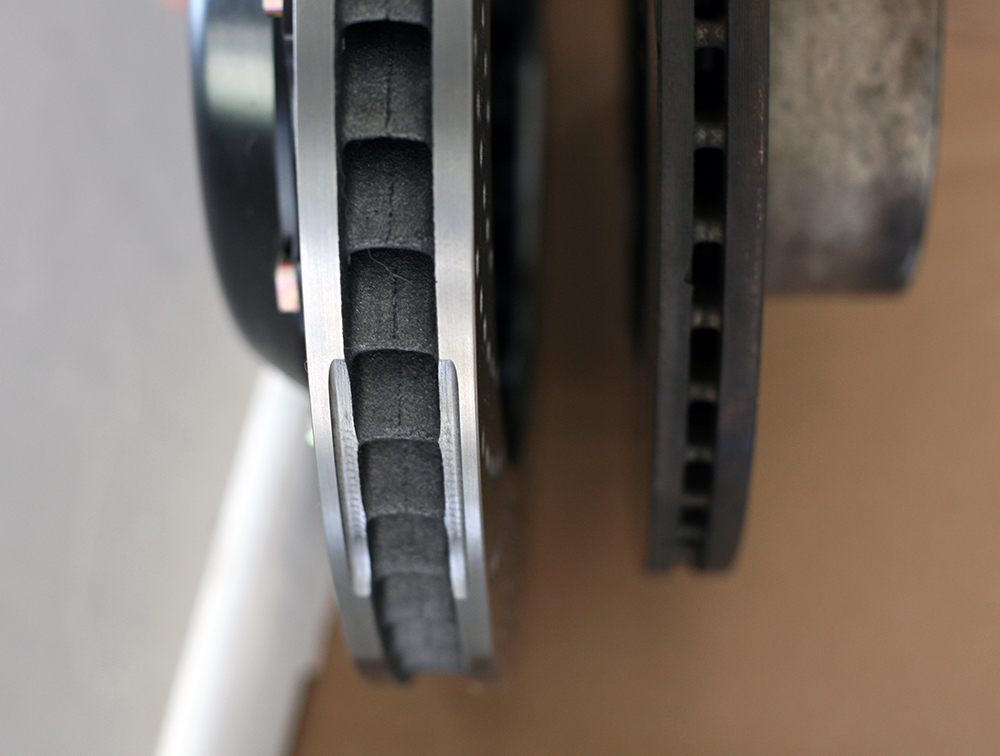
Aside from the new Brembo brakes being obviously bigger in diameter, they are wider and have curved vanes.
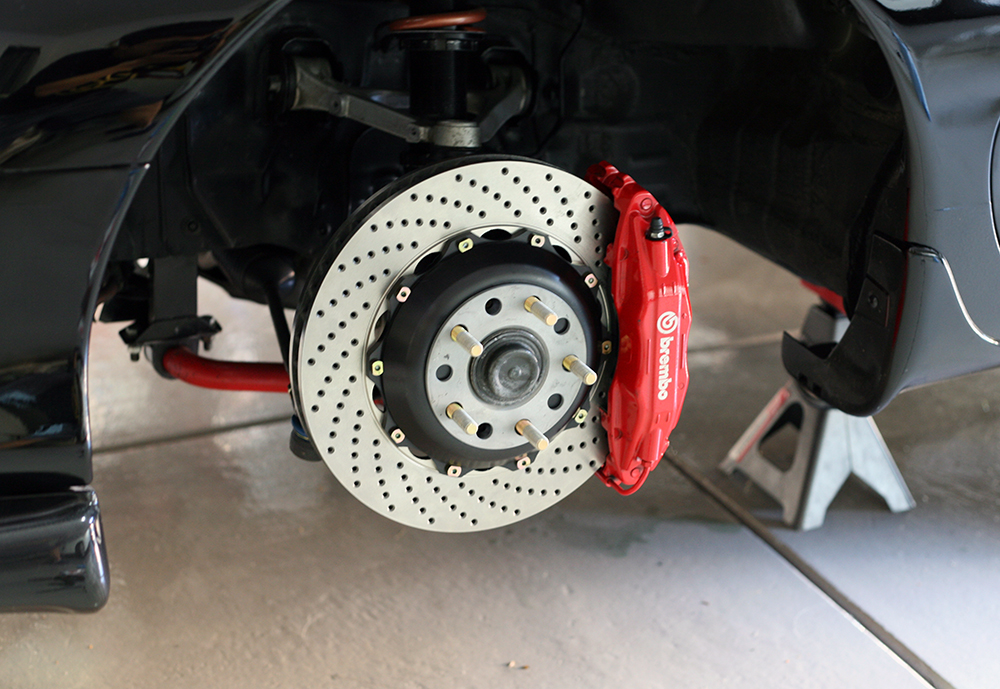
Cleaned, torqued down, and installed.
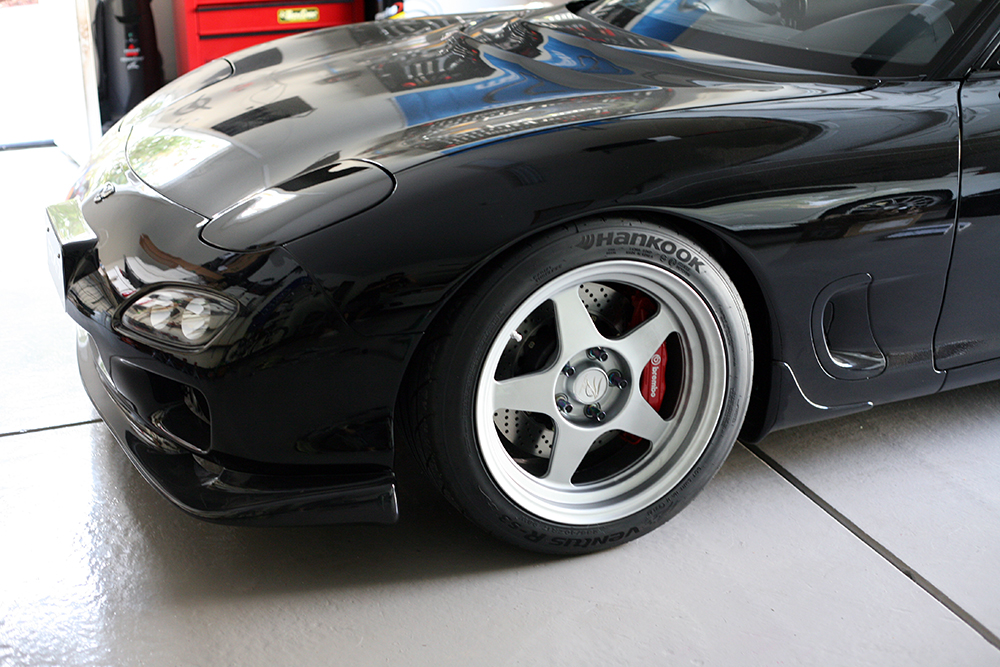
The fitment compatibility with the front wheels was something I eagerly anticipated in testing. Luckily, the BBK was a perfect fit with the 17″ RegaMasters, and really fill up the space inside.
With the fronts taken care of, I also wanted to refresh the rears to be thorough. I bought new lines, pads, rotors, and even remanufactured calipers. The last time ended up being a horrible decision. This is a classic example of doing too much, when you should just keep it simple. My original calipers were in great shape and needed no attention, yet I felt impelled to replace them, which is why reman calipers seemed like a good idea – since a professional company rebuilds and cleans them for you. Long story short, one of the calipers came with a piston that had pitting all over from past rust. Although this may have been functional and leak-free, I refused to install it on my car.
I lied about the story’s brevity, allow me to expand. I called RockAuto.com (I was referred to them by another RX7Club member without realizing it was some hodgepodge discount place) where I purchased these reman calipers from and requested a replacement or a refund. The customer service representative obliged, but noted that I would need to pay the shipping for a replacement. I didn’t feel like this was entirely fair because there was blatant product quality control and conformity issues. I was about to agree to their terms when it was suggested that a “manager” may be able to provide a better solution. After getting transferred to this so-called manager, he single-mindedly to deny my request altogether and dictates that no replacement will be granted. I of course questioned his state of mind and he proceeds to brag about his past “lead technician” credentials. So now I’m stuck with these calipers because this guru mechanic (probably only pumped gas for people) turned big boss manager of a call-center wanted to play tyrant.
DO NOT BUY FROM ROCKAUTO… unless you want to receive garbage parts and then receive false promises.
Needless to say, I opted to reuse my original rear calipers. I did have to put in grunt work to clean them up, strip the old paint, and then repaint them red to match the fronts.

I know red brake calipers may seem cliche, but at the end of the day, they look damn good. Red on Black strikes an interesting contrast. On a related note, Black, Red, and White are colors that grab attention when used in combination (refer to Nazi flag…).
I never seem to have much fortune when it comes to bleeding brakes, in one way or another, it always turns into an excruciating experience. During the first day, I ran out of a liter of ATE SuperBlue fluid. The next morning, a Sunday, I had to track down a store that was open and also carried ATE. I went over a couple cities to a Monument Car Parts store and was luckily able to buy it off their shelves (I’ve never even heard of Monument Car Parts prior to this). Then I proceeded to bleed the brakes for 3 HOURS because I was adamant on getting EVERY little bubble out and made 3 rounds around the car. Why did it take 3 hours? Because TWICE I made the mistake of letting the reservoir run out of fluid, thus sucking in air and forcing me to repeat the process anew. I guess it’s difficult to control everything when you’re so focused on seeing little bubbles come out… pump after pump. It also didn’t help that the Brembo calipers had 2 bleed valves each.
Best of all, I’ll have to rebleed the brakes AGAIN in the near future. I also deleted my ABS and wasn’t happy with a few bends in the new lines, so they will need replacing. I will save this topic for a post of its own, later.
Great car beautiful attention to detail. I was looking at your Bbk install, and looking at the center vains don’t you have the front rotors installed in the opposite direction? I would be interested in knowing because I just bought a used set from someone on the forums
Thanks
Thanks Joe. By center vanes are you referring to the actual cross-drills? Rotors with directional or “curved” vanes need to be installed independent of whatever direction the drilling is. Just from an aesthetics standpoint, it may seem like the rotors should be installed with the drilling sloping forward, or opposite of how I have mine installed. Some manufactures make their drillings or slots this way, in relation to the vanes. In my case, it is the other way around.
And for the rear rotors, they’re actually straight vaned so it doesn’t matter what direction you install them. I just matched up their drillings to the fronts.
Check out this link for more information on rotors: http://zeckhausen.com/how_to_properly_install_rotors.htm
Your rx7 has very good condition. I never seen before. Can I ask you something. That wheel 17X9j +38 or +45?? let me know your regamaster’s offset or specs. And I wanna know that spacer size? 5mm right?. Because I am using same caliper and going to get regamaster. But I heard about regamaster is not clear to brembo gt f50.
Thanks
Hi Changwoo, those RegaMasters were 17×10″ all around, +20 and +40. I spaced the fronts 5mm to +35.
very helpful. Thank you very much! have a nice day.