Although the car is taking longer than initially expected to finish, the passing time has given me a new perspective. I can’t hide the fact that I’m anxious to have the swap completed, but at the same time I’m comforted by having the luxury of busying myself with other aspects of life while the work is performed. If I were to tackle the swap myself in my garage, like the Single Turbo conversion, my weekends and free weeknights would have been greyed out by laborious wrenching. It takes this relativity to understand the magnitude of dedication required by a “hobbyist” to build together a large project by himself. Looking back over the years, I can see just how many weekends were sucked away from me because I had to spend hour upon hour in the garage instead. Granted, I’ve gained invaluable experience from doing so and it wasn’t necessarily a bad way of spending time; however, after having done it, I can really appreciate the convenience of leaving this V8 swap in the hands of a professional instead.
I stopped by the shop the other week to pick up a few remaining leftover parts. All of the crankcase ventilation AN lines were routed to the catch can. The car is getting close, so it’s just a matter of knocking out the last remaining items on the list: finish the wiring, fabricate the exhaust system, fine tune the ride height, install the battery and cables, install the front bumper, and anything else in between.
While Marcus continues to plug away at the car, there isn’t much to update at the moment. So as a filler, here are a couple pictures of the Samberg radiator setup which I forgot to post earlier:
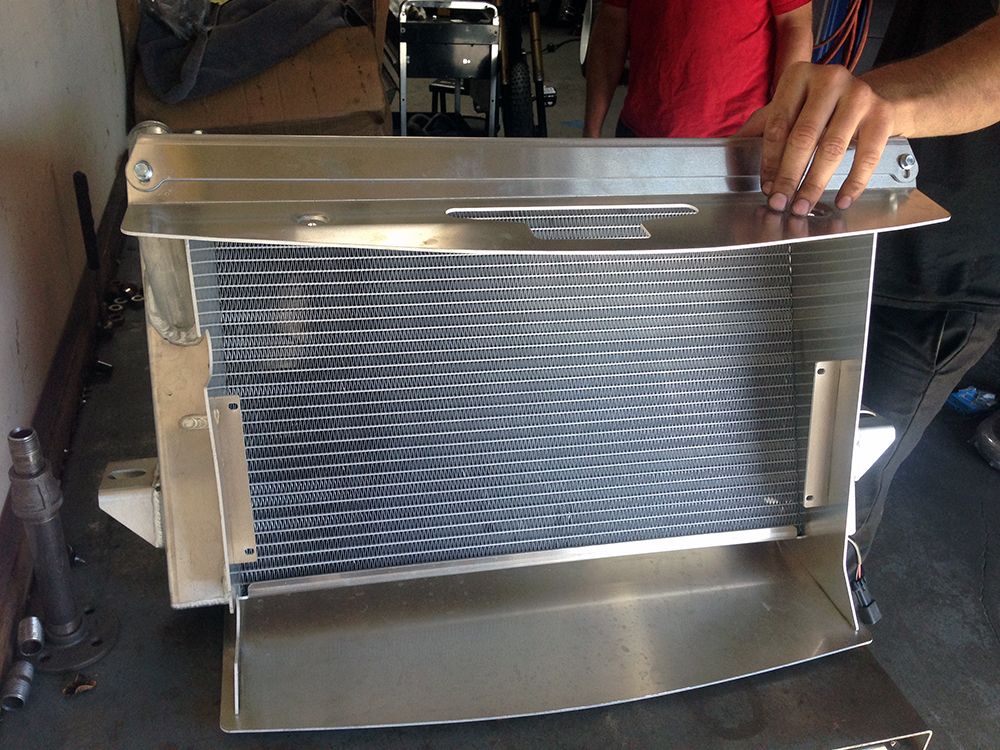

The assembly is fully shrouded with dual SPAL fans and features a cut out for a K&N air filter. The level of quality is very high and I personally think this radiator setup is far superior to any rotary V-Mount offering out there, purely based on its simplicity and integration. I’ve said this before, but if Samberg’s products did not exist for the RX-7, I most likely would not have considered swapping a V8.
In the background, I purchased another new OEM ’99 bumper and rebar. This is my THIRD ’99 bumper and the fourth bumper I’ve had painted for the RX-7. Figuring out the bumper has truly been an enduring task. To make a positive outcome more certain, I also picked up a new set of mounting brackets and rivets from Mazda (which was surprisingly expensive, more than the ’99 bumper skin). The minor deformity issues in the bumper skin from the past was due to transferring the old mounting brackets. The Mazda rivets have a specific torque and do not pull excessively on the skin when installed. The topside of this bumper finally came out nice and flat, and is hopefully something I can live with.
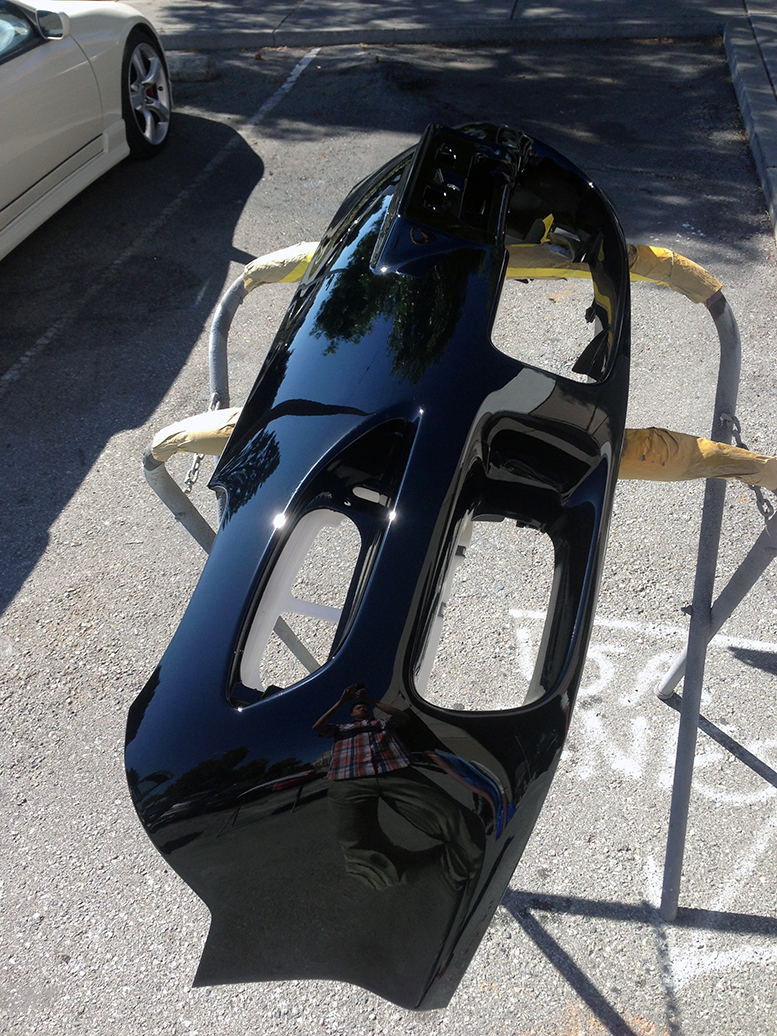
I’m going to hold onto my pre-’99 bumper just incase I decide to flipflop again. At first, I was conflicted with which bumper I preferred, but my cognition was mostly skewed from the feeling of disillusionment of all the failed ’99 bumpers. In the end, I know that the car needs to have the updated look of the ’99 bumper.
i dont think my body is ready for this jelly
Exciting updates! Were you planning on using the 93 bumper beam with the 99 spec bumper skin this time around? Just curious if you forsee any fitment issues.
Nope, I rebought the ’99 rebar to go along with this bumper as well :-)
Eric did you buy new mounting brackets and rivets from mazda to tackle this install ? I’d like to avoid the unflush bumper skin you mentioned.
Thanks !
I did, which were $$$ but worth it. The key is to use the Mazda rivets because they have the right torque on them and won’t distort the skin.