While my pace with the car has certainly slowed down, it is by no means at a halt. There’s still plenty to do and I’ve been actively working in the background. Admittedly, I need to fall back into a rhythm with this website to keep the updates flowing.
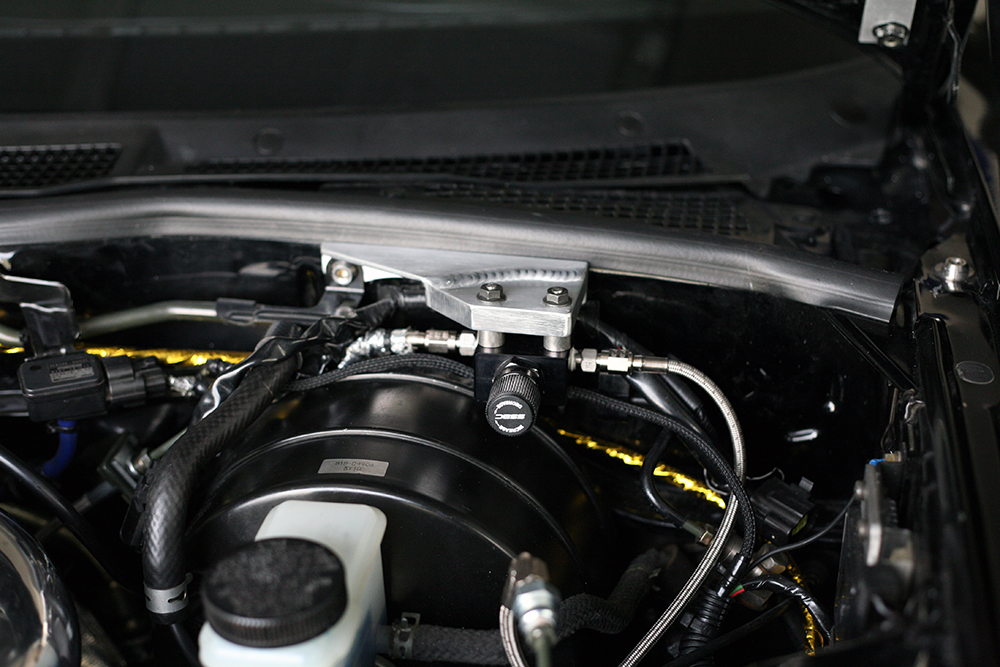
Let’s start with a small part I had made recently, pre-Wekfest. After deleting the ABS, the rear brake proportioning valve was left suspended by the lines without any support. I could have attempted to make a bracket myself, but I wanted something higher-end than what I would be able to rig together. So, once again, I leveraged the engineering prowess of FFTEC and dropped the car off one Friday to have them handle it.
Having custom fabrication work done is never cheap, but it’s a worthy investment. FFTEC made me a nice, beefy aluminum bracket that almost resembles a billet piece. I was pleased with the product, however, the story would be too easy if it ended there. Due to the close vicinity of the brake booster, the proportioning valve had to be positioned further outboard. This put tension on one of its brake lines, and wasn’t entirely optimal. If the proportioning valve could be moved downwards, it would relieve the stress on the line and place it into a more neutral orientation. I made a few measurements and ordered a pair of SS 5mm spacers, a pack of SS M6 button-head bolts, and M6 flange nuts from McMaster-Carr.
Unfortunately, I still wasn’t quite satisfied with the 5mm spacing… so I tried again by reordering a pair of 10mm spacers and another pack of appropriate length bolts. For this iteration, I was under a time-crunch since Wekfest was around the corner. I had to pay Next-Day shipping twice because the spacers and bolts were shipped out of 2 different locations. My efforts proved to be in vain, because one of the packages was delivered to the wrong address by UPS. You can only smile and move on in situations like this.
Here’s the proportioning valve and bracket with the 10mm spacers. Excuse the dirty engine bay, the car just came back from having work done at the body shop (more on that later).
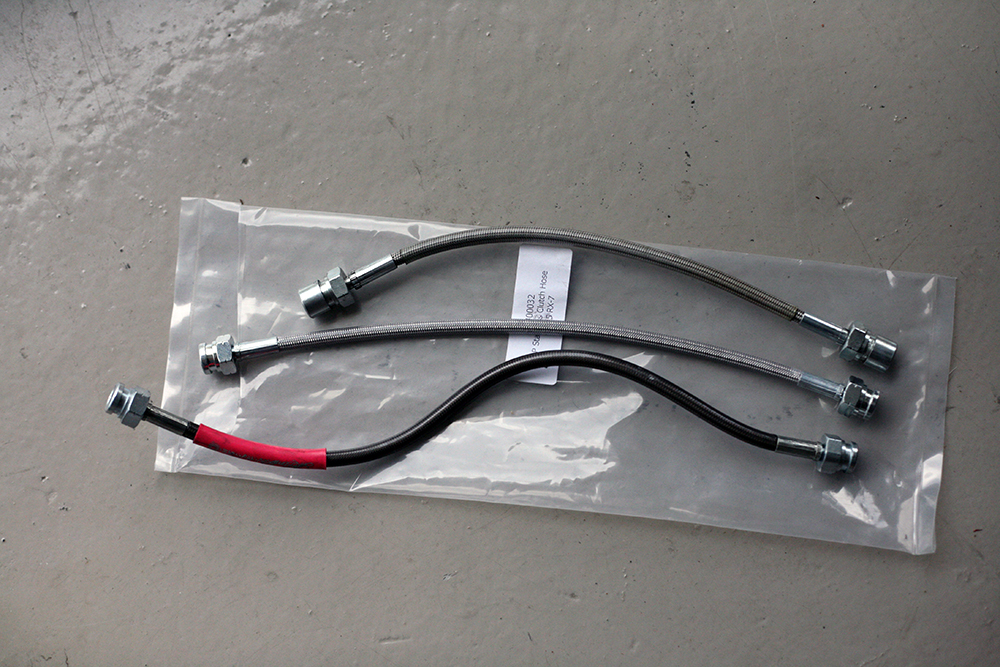
Today, I installed a stainless braided clutch line. For the third time. Back when I had the ACT clutch installed by PR Motorsports, I asked them to throw on a clutch line that I bought years ago for my first RX-7. It was convenient that I had found it in the garage, but I wish I never did. This line ended up being too short so one of the retaining brackets couldn’t be bolted to the chassis. Of course, having a less than ideal install with a floating, unsecured bracket lingered in my mind and bothered me.
Around the same time I had the proportioning valve bracket fabricated, I also dropped my car off to PR Motorsports to have them pluck the ABS computer from the rear hatch area. This was a rare instance where I willingly wanted someone else to work on the car. Dealing with fragile interior parts is a weakness of mine. I didn’t want to hassle with plastic clips and risk breaking tabs, so I simply paid a professional to take care of it for me… worry free. Anyway, I gave PR Motorsports another clutch line to swap out, one that I deliberately checked with a vendor to confirm that it was longer. This second try ended up being too long. While the retaining bracket could now be affixed without issue, the line itself was bent in an S-shape due to excess length.
Finally, I bought another line and installed it myself. And yes, this third line was the perfect length… thank God. Here’s a comparison of the 3 lines, proper length one is in the middle.
The theme of this post should provide insight on the trials and tribulations required when working on cars. It’s not an easy job, err… hobby? You just have to take it in stride, and do what needs to be done. An auto-pilot, no frills kind of life would end up too boring and meek, anyway.
ballur